Thanks to @roryaronson for the info about aligning the photo to the FB head in the virtual bed.
Now I have done that, there is still some weirdness going on.
This is the photo when using the grid to take photos across the whole bed
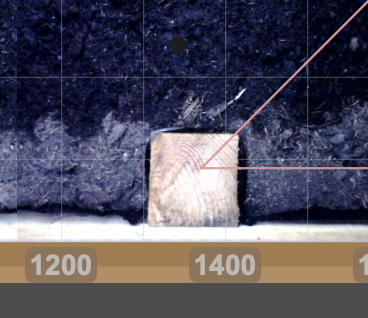
This is the photo directly above the post
You grid is not aligned to the reality of the image. Is there someway to tweak the settings so it photos better when joining up composite photo. It looks really bad when there are plants as they just don’t make sense.
Also, I have the FB calibrated beautifully to mount and dismount tools (so the alignment is correct) but in the photos, there is a misalignment between virtual tools and photos. It looks like a scaling issue as the second slot is above where it should be. Is there a setting to tweak this?
This is the unfortunate reality of parallax. The calibration of the camera can only match image pixels to FarmBot coordinates if the objects in view are at the same Z height that the camera calibration card was at when the camera was calibrated.
Your bed’s posts, tools, toolbays, and eventually taller plants are closer to the camera than the soil surface, so those objects will always appear larger than the virtual FarmBot visualization in the farm designer. That’s because the current farm designer does not have any perspective - it is an isometric 2D projection where an object at any distance appears the same size. This will hopefully look a little better/more accurate in the coming 3D environment!
This parallax is also what causes the poor looking seams in the composite photo for objects outside of the calibrated Z distance like your bed’s posts. That because the composite image needs to “squish” all of the pixels into the correct scale, but the wood post is taking up more pixels because it is closer. When the images are taken from the sides, you get a funny seam in the middle.
One theoretical way to minimize the poor joints is to take photos that cover a narrower area and take more of them. This would make say, 4x the seams, but each seam would be half as bad for those objects outside of the soil surface Z level.
The main takeaway though is that there are unfortunately no settings to really tweak things to make objects look seamless across Z levels. But, if you have objects that you want to image (ie: your plants) without seams, then you can position the camera directly above the plant rather than hoping it is does not fall on a seam in a photo grid.
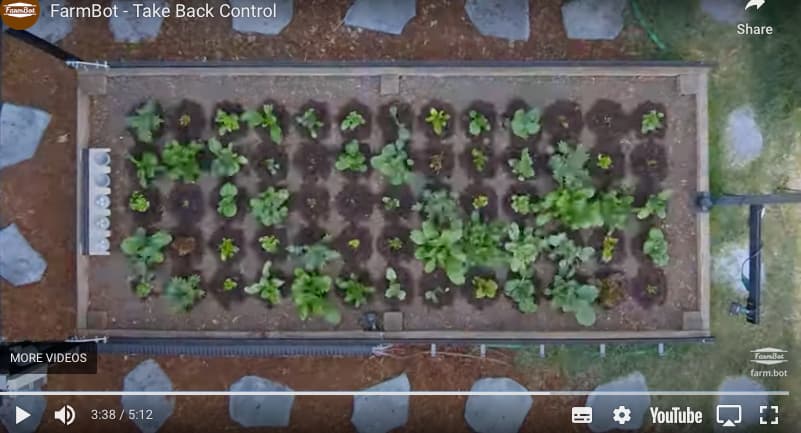
Looking closer, it is obviously not from the gantry-mounted camera. I think every FB user want to have this kind of image to be able to observe their FB from the comfort of their warm office.
Do you know what camera and height this was taken from as the image is brilliant and it would be nice not to have to work out all the math (camera viewing width, height etc) to get the right camera to capture the whole bed.
That was taken with a GoPro (which has a fairly wide field of view) mounted about 12ft off the ground. So, it unfortunately did not offer a live view of the garden like a security camera does.