A big thank you to the farmbot team for humouring me and my plethora of diy questions
I will be posting progress of my project here and invite anyone to contribute especially those who have build a farmbot from scratch. Gotta run the boss is here
A big thank you to the farmbot team for humouring me and my plethora of diy questions
I will be posting progress of my project here and invite anyone to contribute especially those who have build a farmbot from scratch. Gotta run the boss is here
07:00 Sunday morning in autmnal and wet Wales.
We rent a house in the small town of Caerleon in Sourh Wales (uk). I am definitely one of the ‘would love to grow my own food but struggle with the time and knowledge’ brigade, so when i saw the FarmBot ad my interest was definitely piqued. At first it was an interesting curiosity and i mentally logged it with the vast number of projects i have seen and would like to emmulate. Then there was Covid, the global lockdown, and a spotlight on the fragility of our supply chains, the queues outside the supermarkets, the panic buying, the global shortage of loo roll and a marked increase in the cost (and hassle) of living. Along with this came the inevitable consideration of self sufficiency. Immediately the FarmBot was moved to the front of the contemplation queue.
I have built many machines, tools and systems over the last 30 years and i have noticed that ideas that grow into plans that grow into designs that grow into reality are quite like plants themselves in that they really do benefit from being allowed to grow at their own pace. Long story short, I have been thinking about this build for about 18 months now during which i have been collecting parts, researching the broad supporting technologies and modelling hypothetical scenarios in order to settle on a suitable strategy.
The project as i see it comprises 4 sections;
Prepare the ground
Build a bespoke polytunnel and garden infrastructure
Build and install the Farmbot
Learn to make the system work in a truly practical manner such that it saves time, money and a small bit of our environment.
Preparing the ground.
We moved into our current home in April 2021, its a terraced house with a long thin garden, half of which is flat grass (and a load of weeds) and half of which was undulating ground, weed membrane, 3 tons of pea gravel, building waste, scrap metal, a few years of garden detritus and a not quite fallen down shed. This section is to be my farm.
After removing the metal and plastic rubbish and burning much of the garden waste I began the soil sorting process. I methodically sieved the entire area and separated into piles of soil, gravel, synthetics, and lumps (bricks and large stones etc). I knew i wanted flat and level ground for the farmbot and as the ground was a gradient it seemed obvious that i needed to remove material from the top and place it at the bottom (cut and fill) and as such some sort of retaining wall would be needed at the bottom. To this end I loosely piled all the chunks of brick and stone at the bottom of the patch, the plastcs and glass went into a small bin, i piled the soil as close to the fill zone as i could get it and the gravel went to the top of the patch round the shed. After a few days (spread over a couple of months) i had processed and removed all the material on top of the weed membrain and had a bumpy, upward sloping carpet and 3 big piles of stuff.
I pulled up the membrain and set it aside. Working in strips across the patch i broke up the soil underneath sieved that as well, digging down to a garden forks depth, continually separating and sorting into the now established piles. The soil is starting to look and feel really nice. It was pretty obvious where the high and low corners were so gradually with a spade i moved the high corner to the low by throwing the soil. it was a slow but satisfactory system in that there is no barrowing and it can be achieved without any journeys. also each spadeful can go pretty much exactly where its needed.
for the final levelling i sharpened 8 short lengths of 2"*2" timber and screwed them to the ends of 4 decking planks which i drove into the long edges of the patch, setting the top edges at the level i wanted. So i now have 2 long level wooden rails either side of the patch. i used a long piece of 2"*4" timber to scrape any high spots off and locate any low spots. Oh the joy. I can really see it now.
(btw how do i add photos here?)
Poly tunnel.
This is still all in my head atm but I know this much…It has to be designed such that it can easily be moved to our next house. it has to be modular and extendable from both ends. It has to be part normal poly tunnel and part netting tunnel. It has to have good doorways and windows that are quick and easy to operate, ideally designed such that automated operation can easily be retro fitted. I think steel pipe driven into the ground to support hoops of plumbing pipe that will be cable tied into a suitable structure. for the covering i want something that i can sew and eyelet, add zips and velcro to, made in small, managable sections. a lightweight timber fram at each end for the doors.
the heights and levels need thinking about. the z axis of the farmbot dictates the height of the vertical section of the polytunnel walls, but the raised bed is a much more comfortable working height but to have a raised bed and then the z axis means the polytunnel has to be much higher which means heaps more investment of both time and money so i am thinking to keep the farmbot at ground level, and make a sunken walkway down the middle of the patch thus the seeds will all be planted at waist height but the polytunnel can be as low as possible.
i also want to make the growing area into the thermal mass for a rocket mass heater which will create a ‘hot bed’ for growing melons and maybe avocados (is that even possible) and also extend the growing season.
Building the Farmbot.
Cartesian Stage. I built 2 very successful hole drilling robots a few years ago. They required 1m and 2m lengths of 50.50.5 angle steel to be loaded, then gripped, moved and drilled with 5 and 10mm holes at specific centres. I made a 6m rail and trolley that was moved by a looped toothed belt driven by a stepper/servo controlled by linuxcnc. the trolley stopped at a hole and a pneumatic stage was used to descend and retract the drill head.
The rail was a simple unistrutt (40*40 galv 'u’section used to hang ducting) with a very simple skate made from 20.20 box steel, 2 m10 shafts and four bearings. I was skeptical at first but it workd and worked and worked.
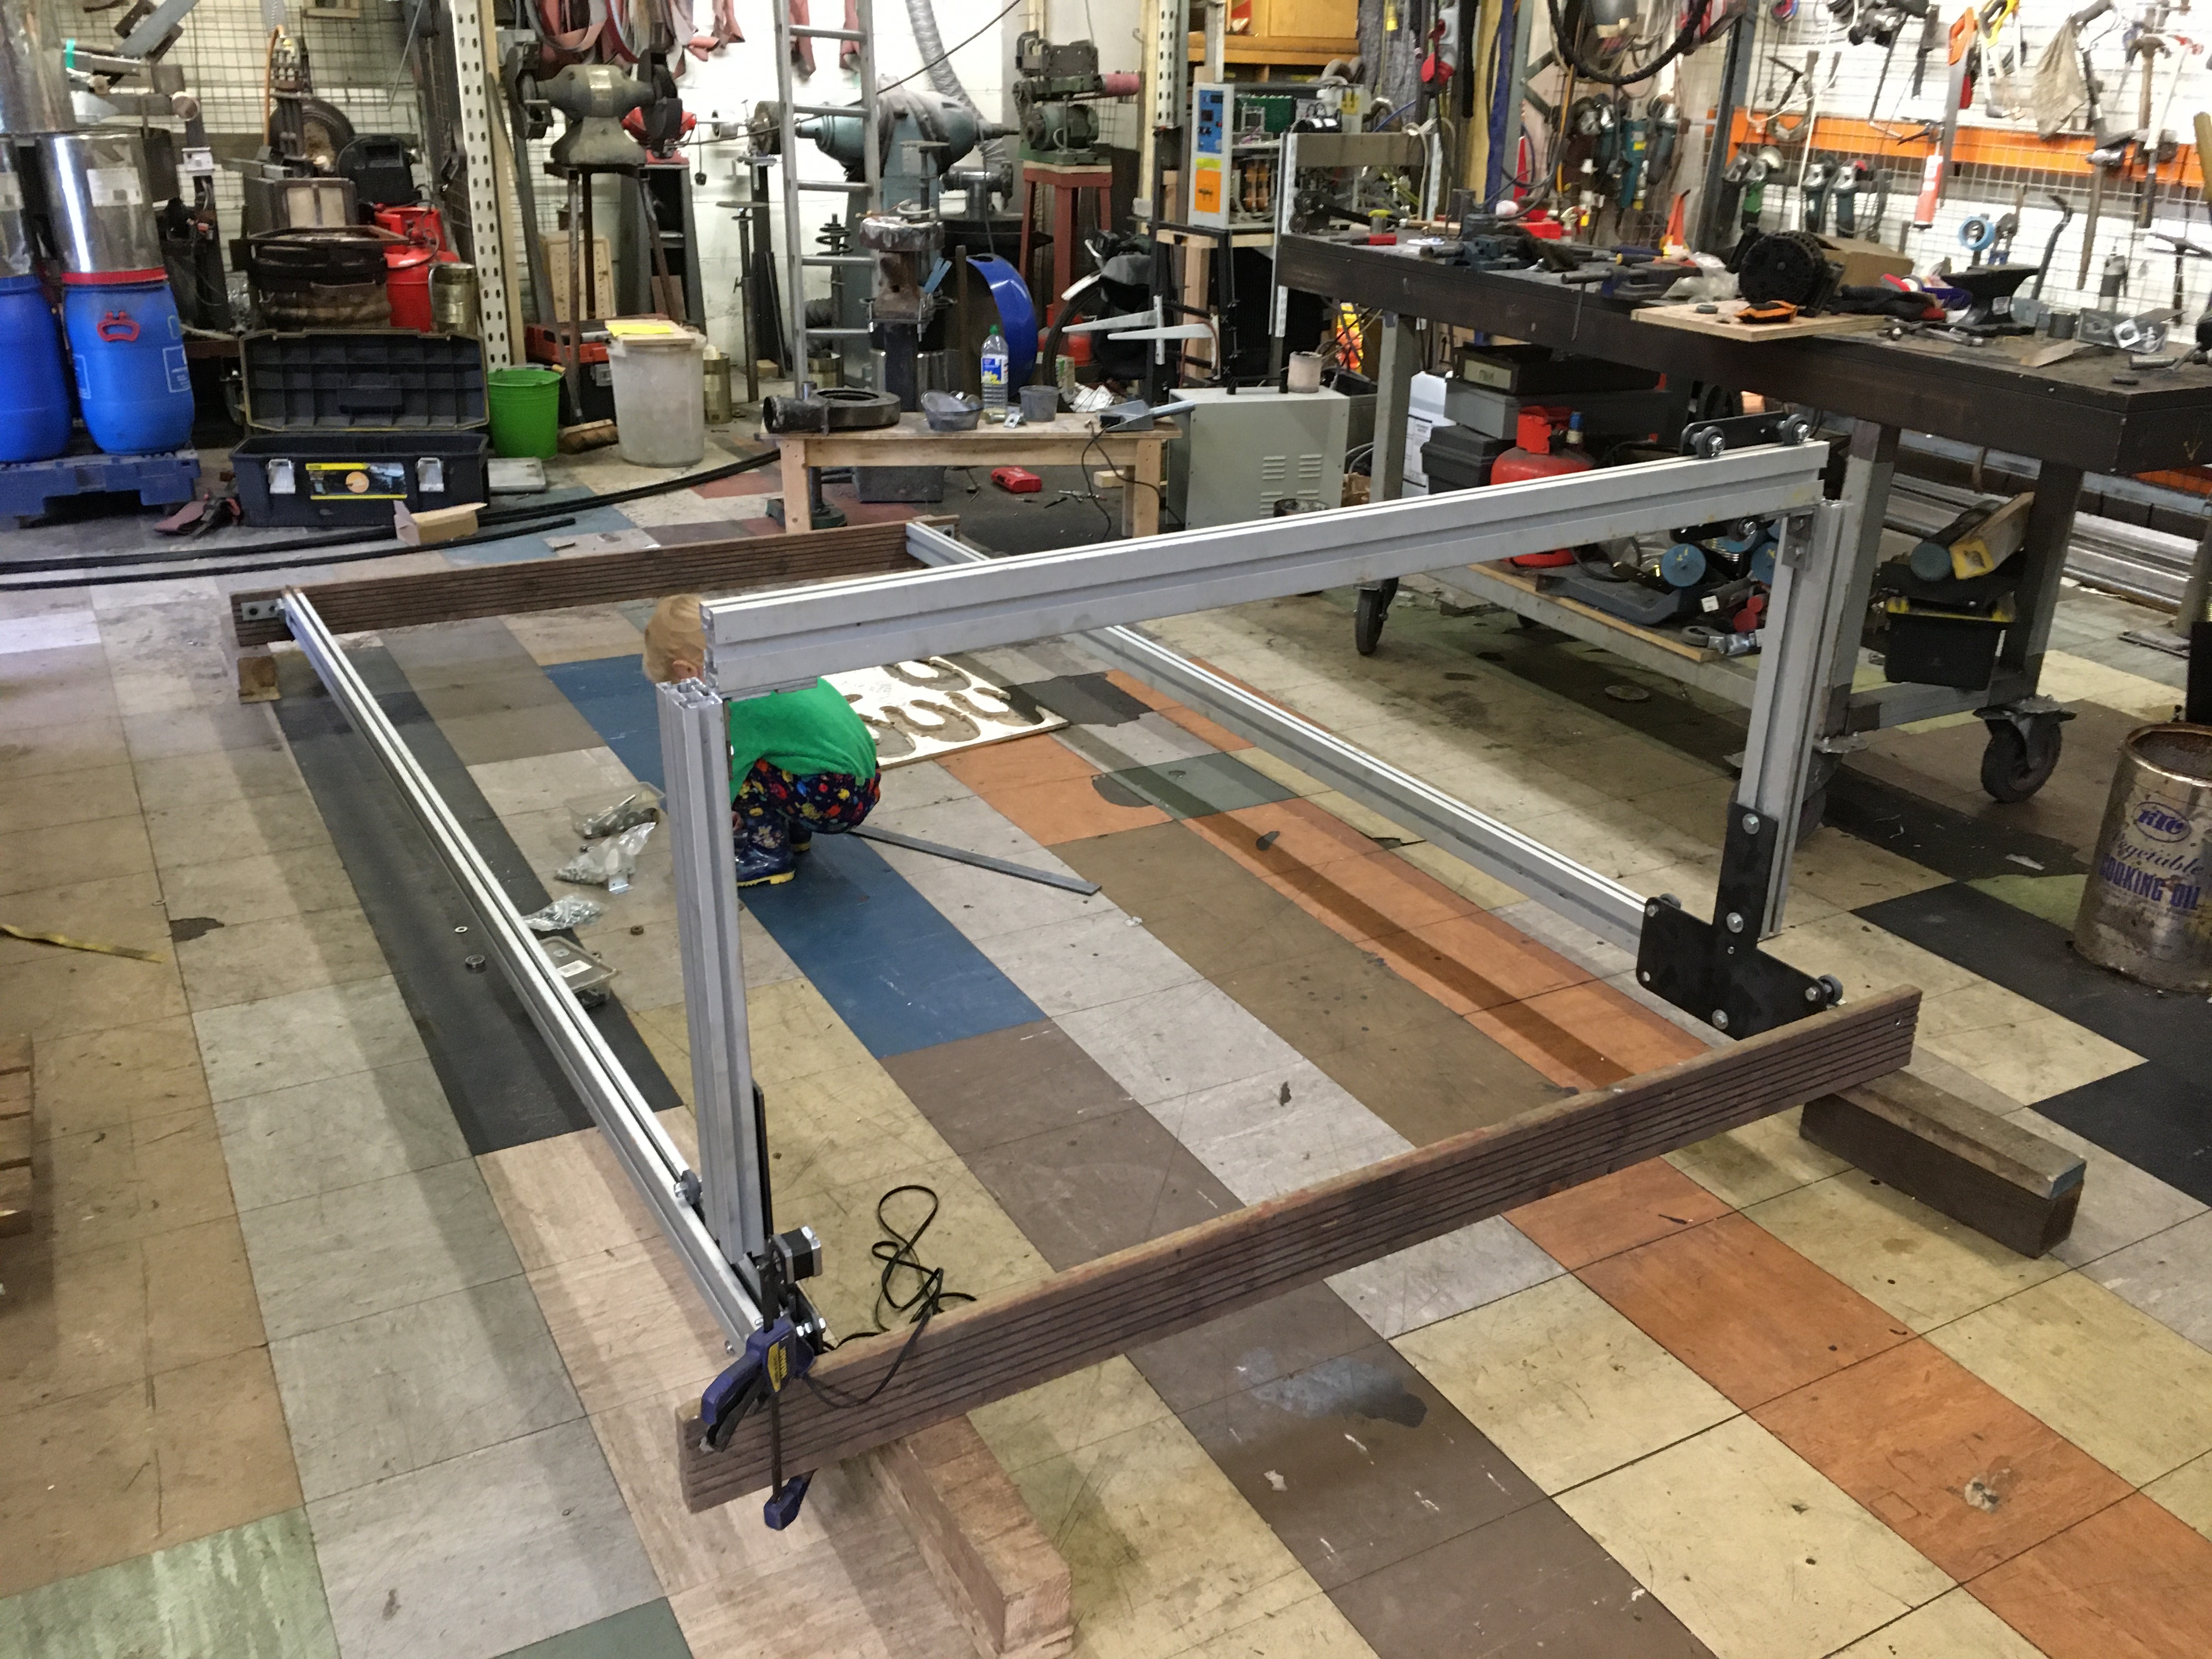
the unistrutt system is of a modular design and has many associated accessories that enable any structure to be created. When i started seriously thinking about the farmbot I naturally gravited towards unistrut for the frame. its cheap, its strong and its galvanised.
i have 2 frames in the workshop now,.1 made from unistrutt which i think is the one that is going into the polytunnel and one from ali extrusion that came from the scrap yard. the latter is farmbot express size and will be installed onto w wheeled raised bed. this will live at my workshop for development purposes and can be moved outside in the morning and inside when i need to work on it.
the whole frame thing i think is quite straight forward, 2 long bits (x axis), i medium bit (y axis) and 2 short bits (z axis), bearings, belts and joiners, wood, metal or even plastic.
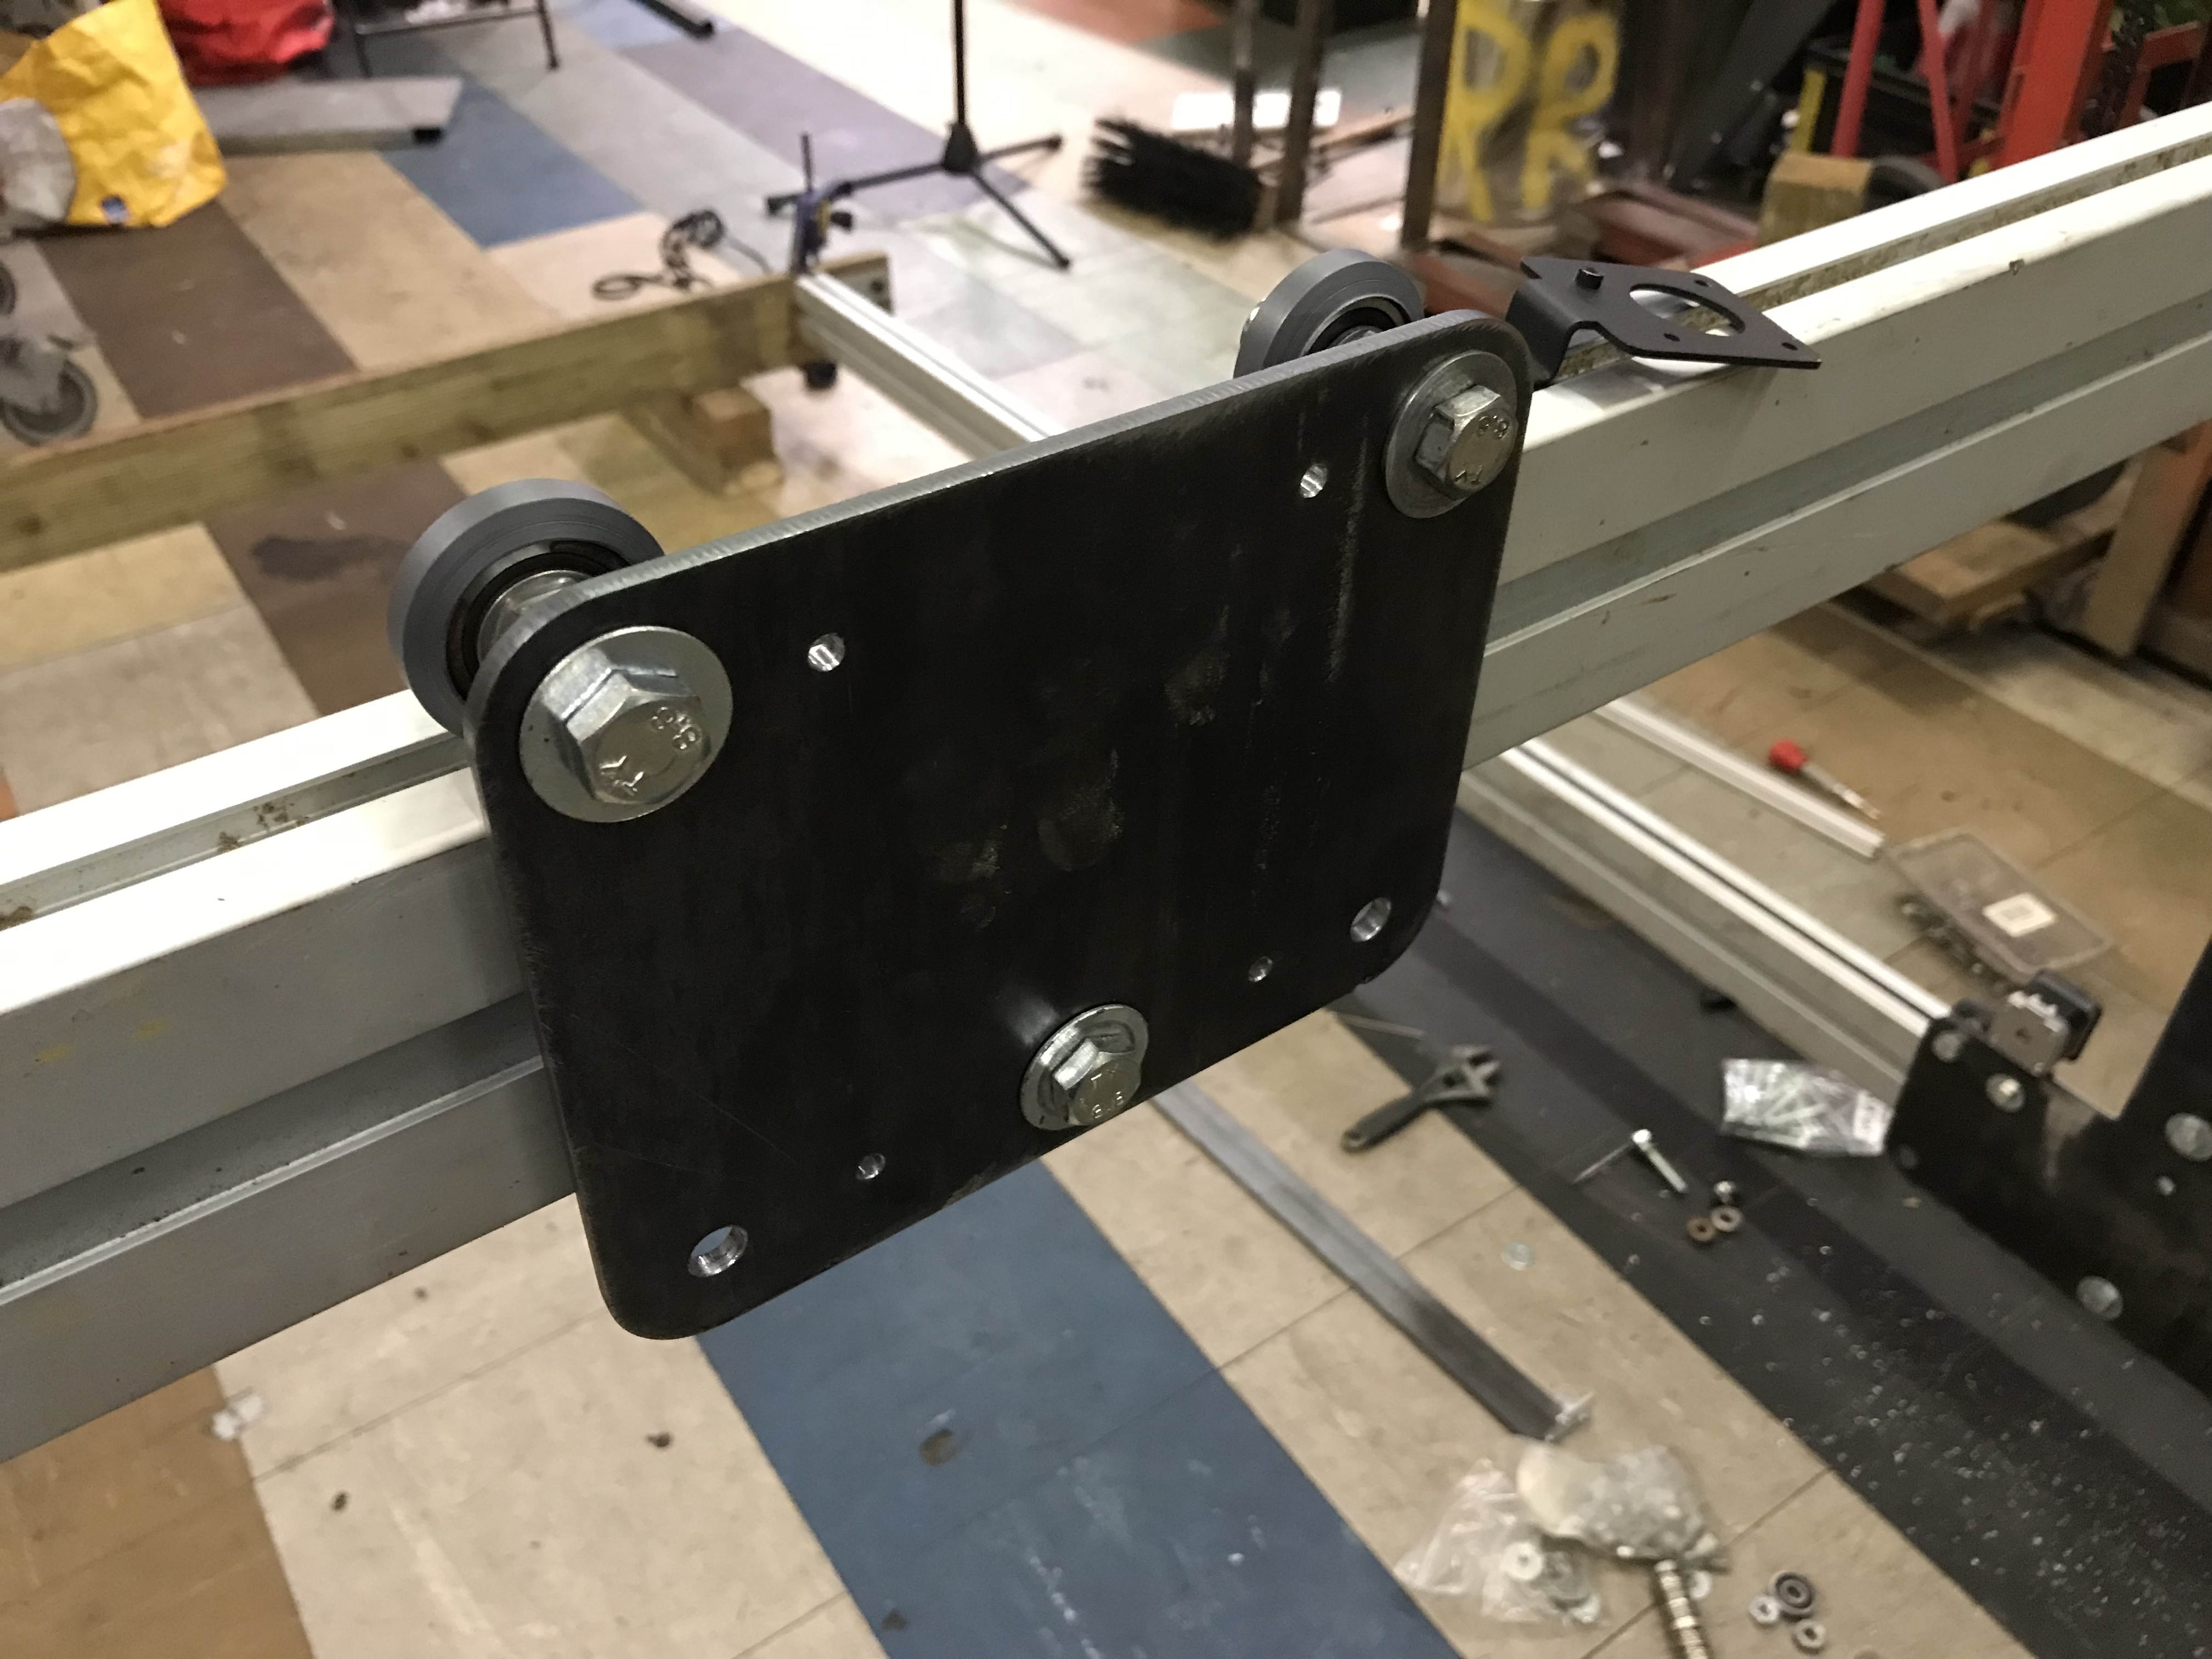
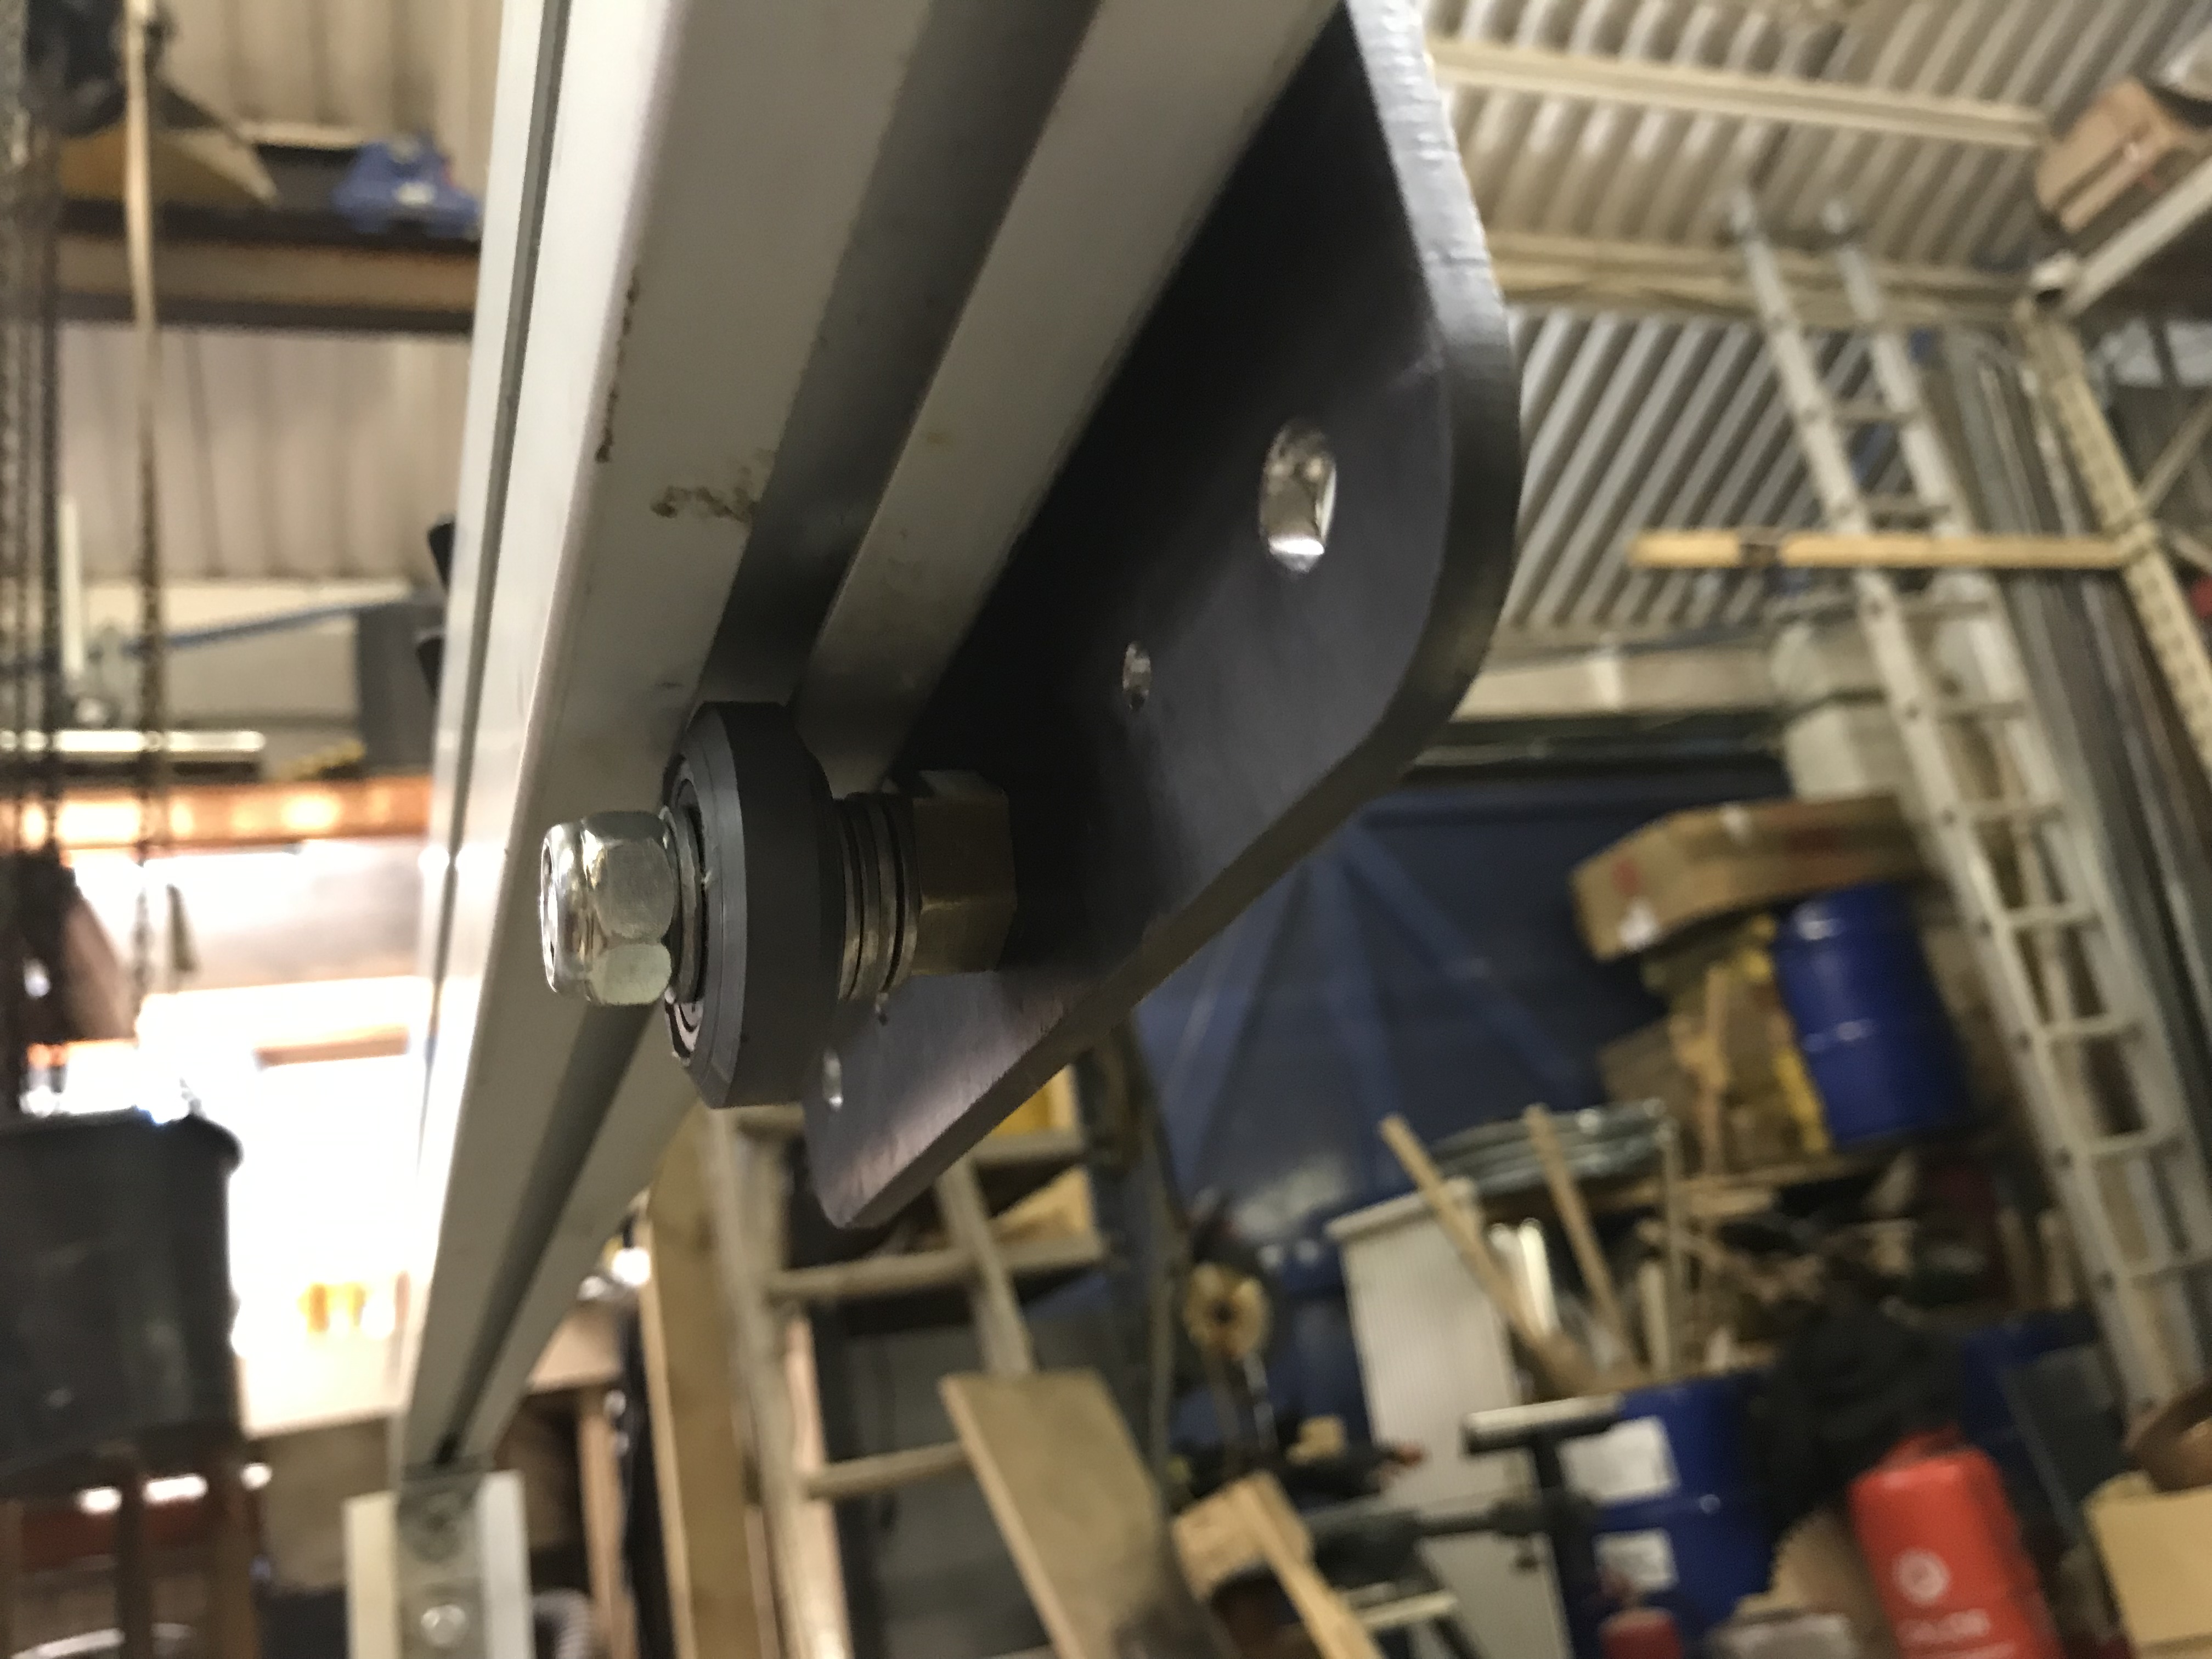
for the carriages, so far i have completed those for the small frame from cnc plasma cut steel and home made v wheels. these are 40mm od and 9mm thick, taking a 30.9.10 bearing.
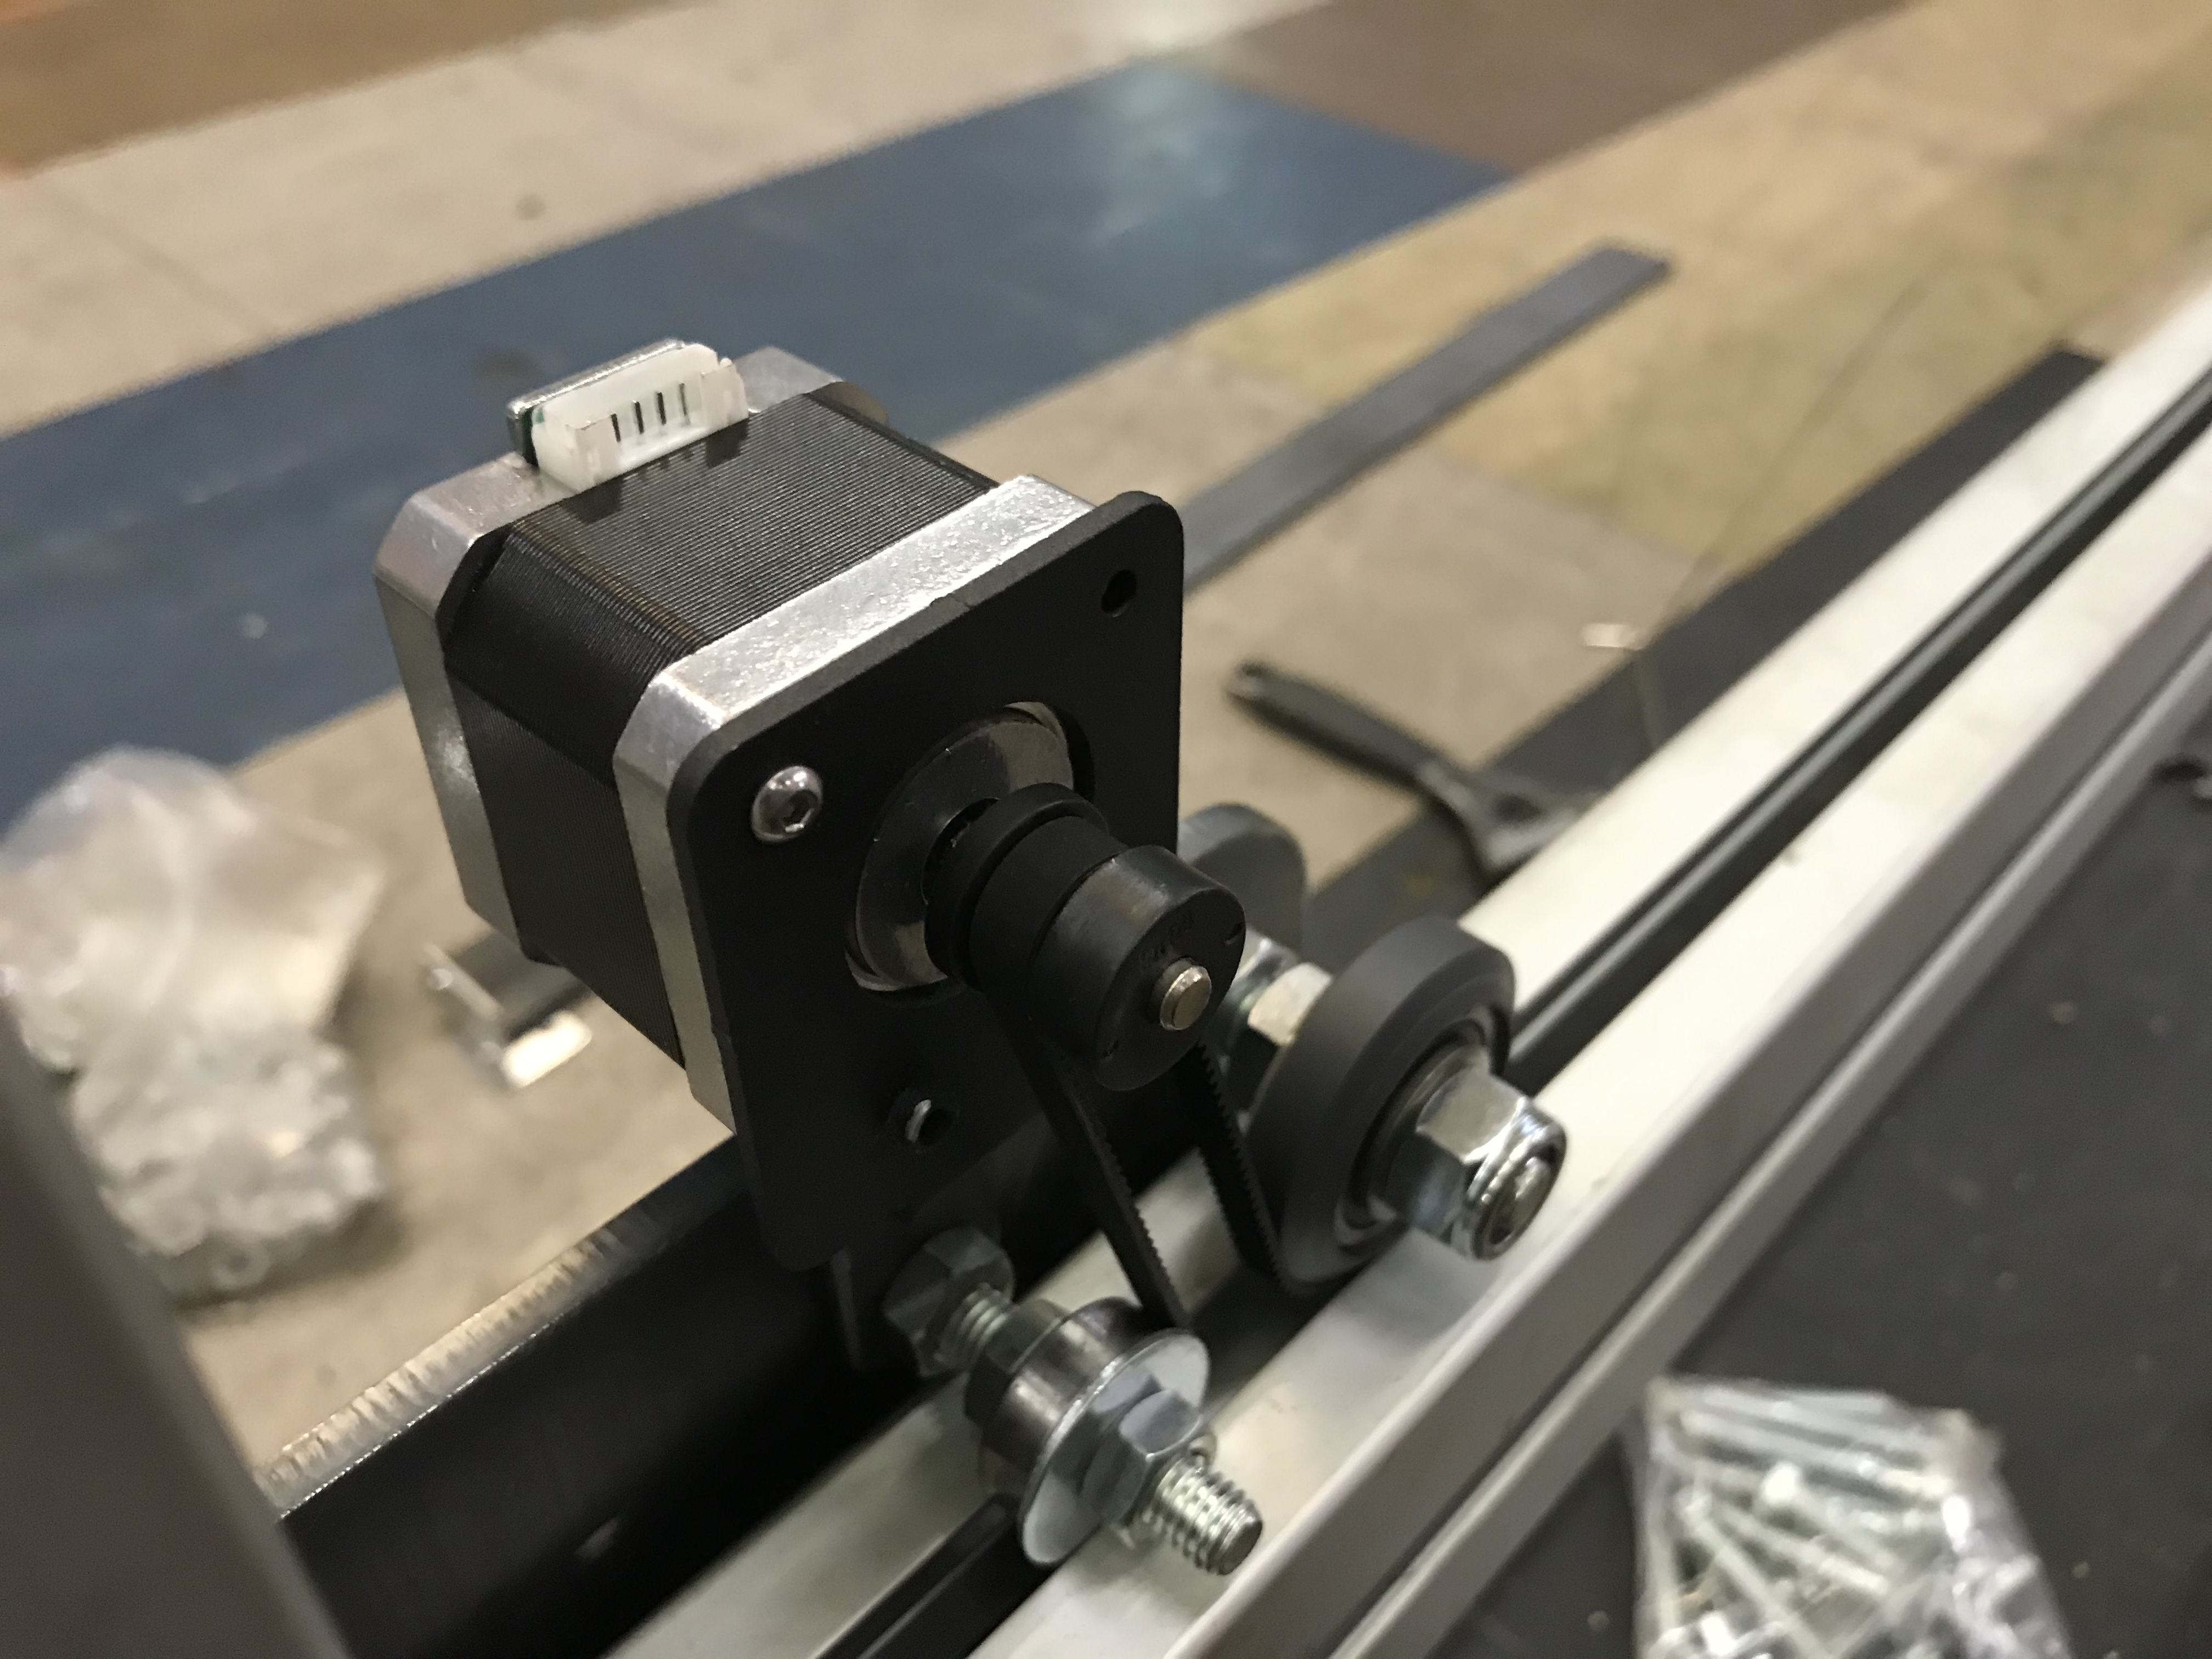
I am deviating from the farmbot design on one key point. i am going to (atm) use a single motor for the x axis that drives a shaft on the back of the y axis that has a pulley on each end which engage with the x axis belts. My reason? the farmbot uses encoders and i feel that having only one encoded x axis motor is something i cant live with but farmbotos only accepts one encoded x motor, so i want to use a bigger single motor and a single encoder. it just feels happier to me. on the small frame i am using gt2 but i might well go to t5 for the bigger one along with nema 23s all round
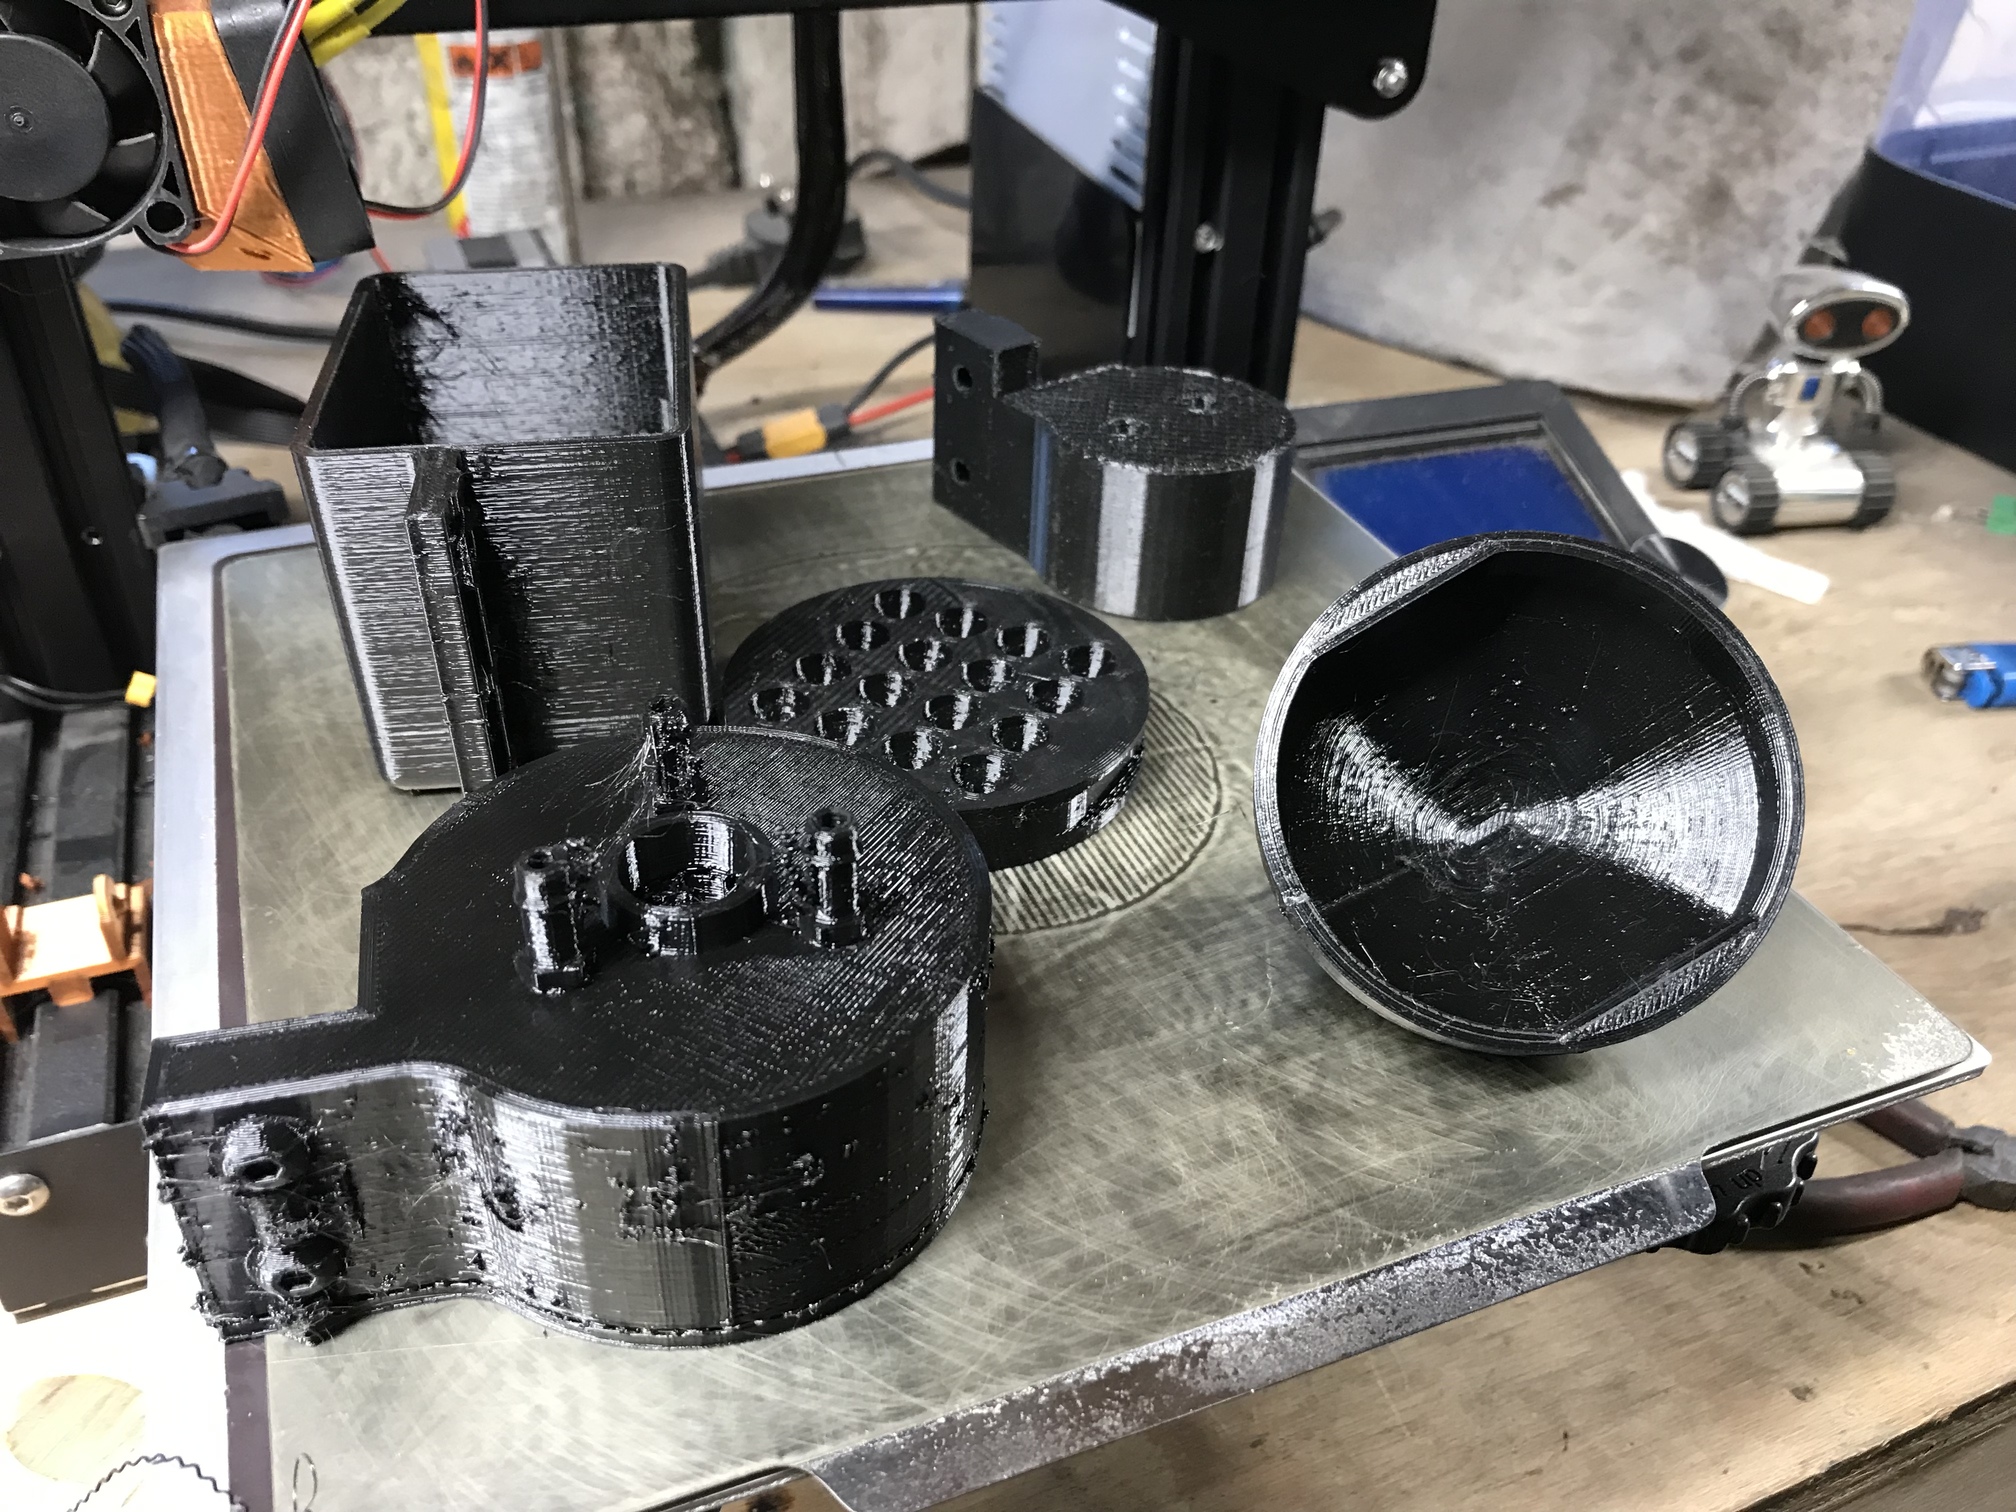
The other hardware, My pair of ender3s are slowly working their way through the plastic parts - i have a utm, seeder and seed trays so far, the cable carriers, water pump, vacuum pump, camera etc i will buy. for the z screw, as the accuracy is not super critical i am probably happy with ss M8 threaded rod and a hot formed plastic nut (like the old reprap printers).
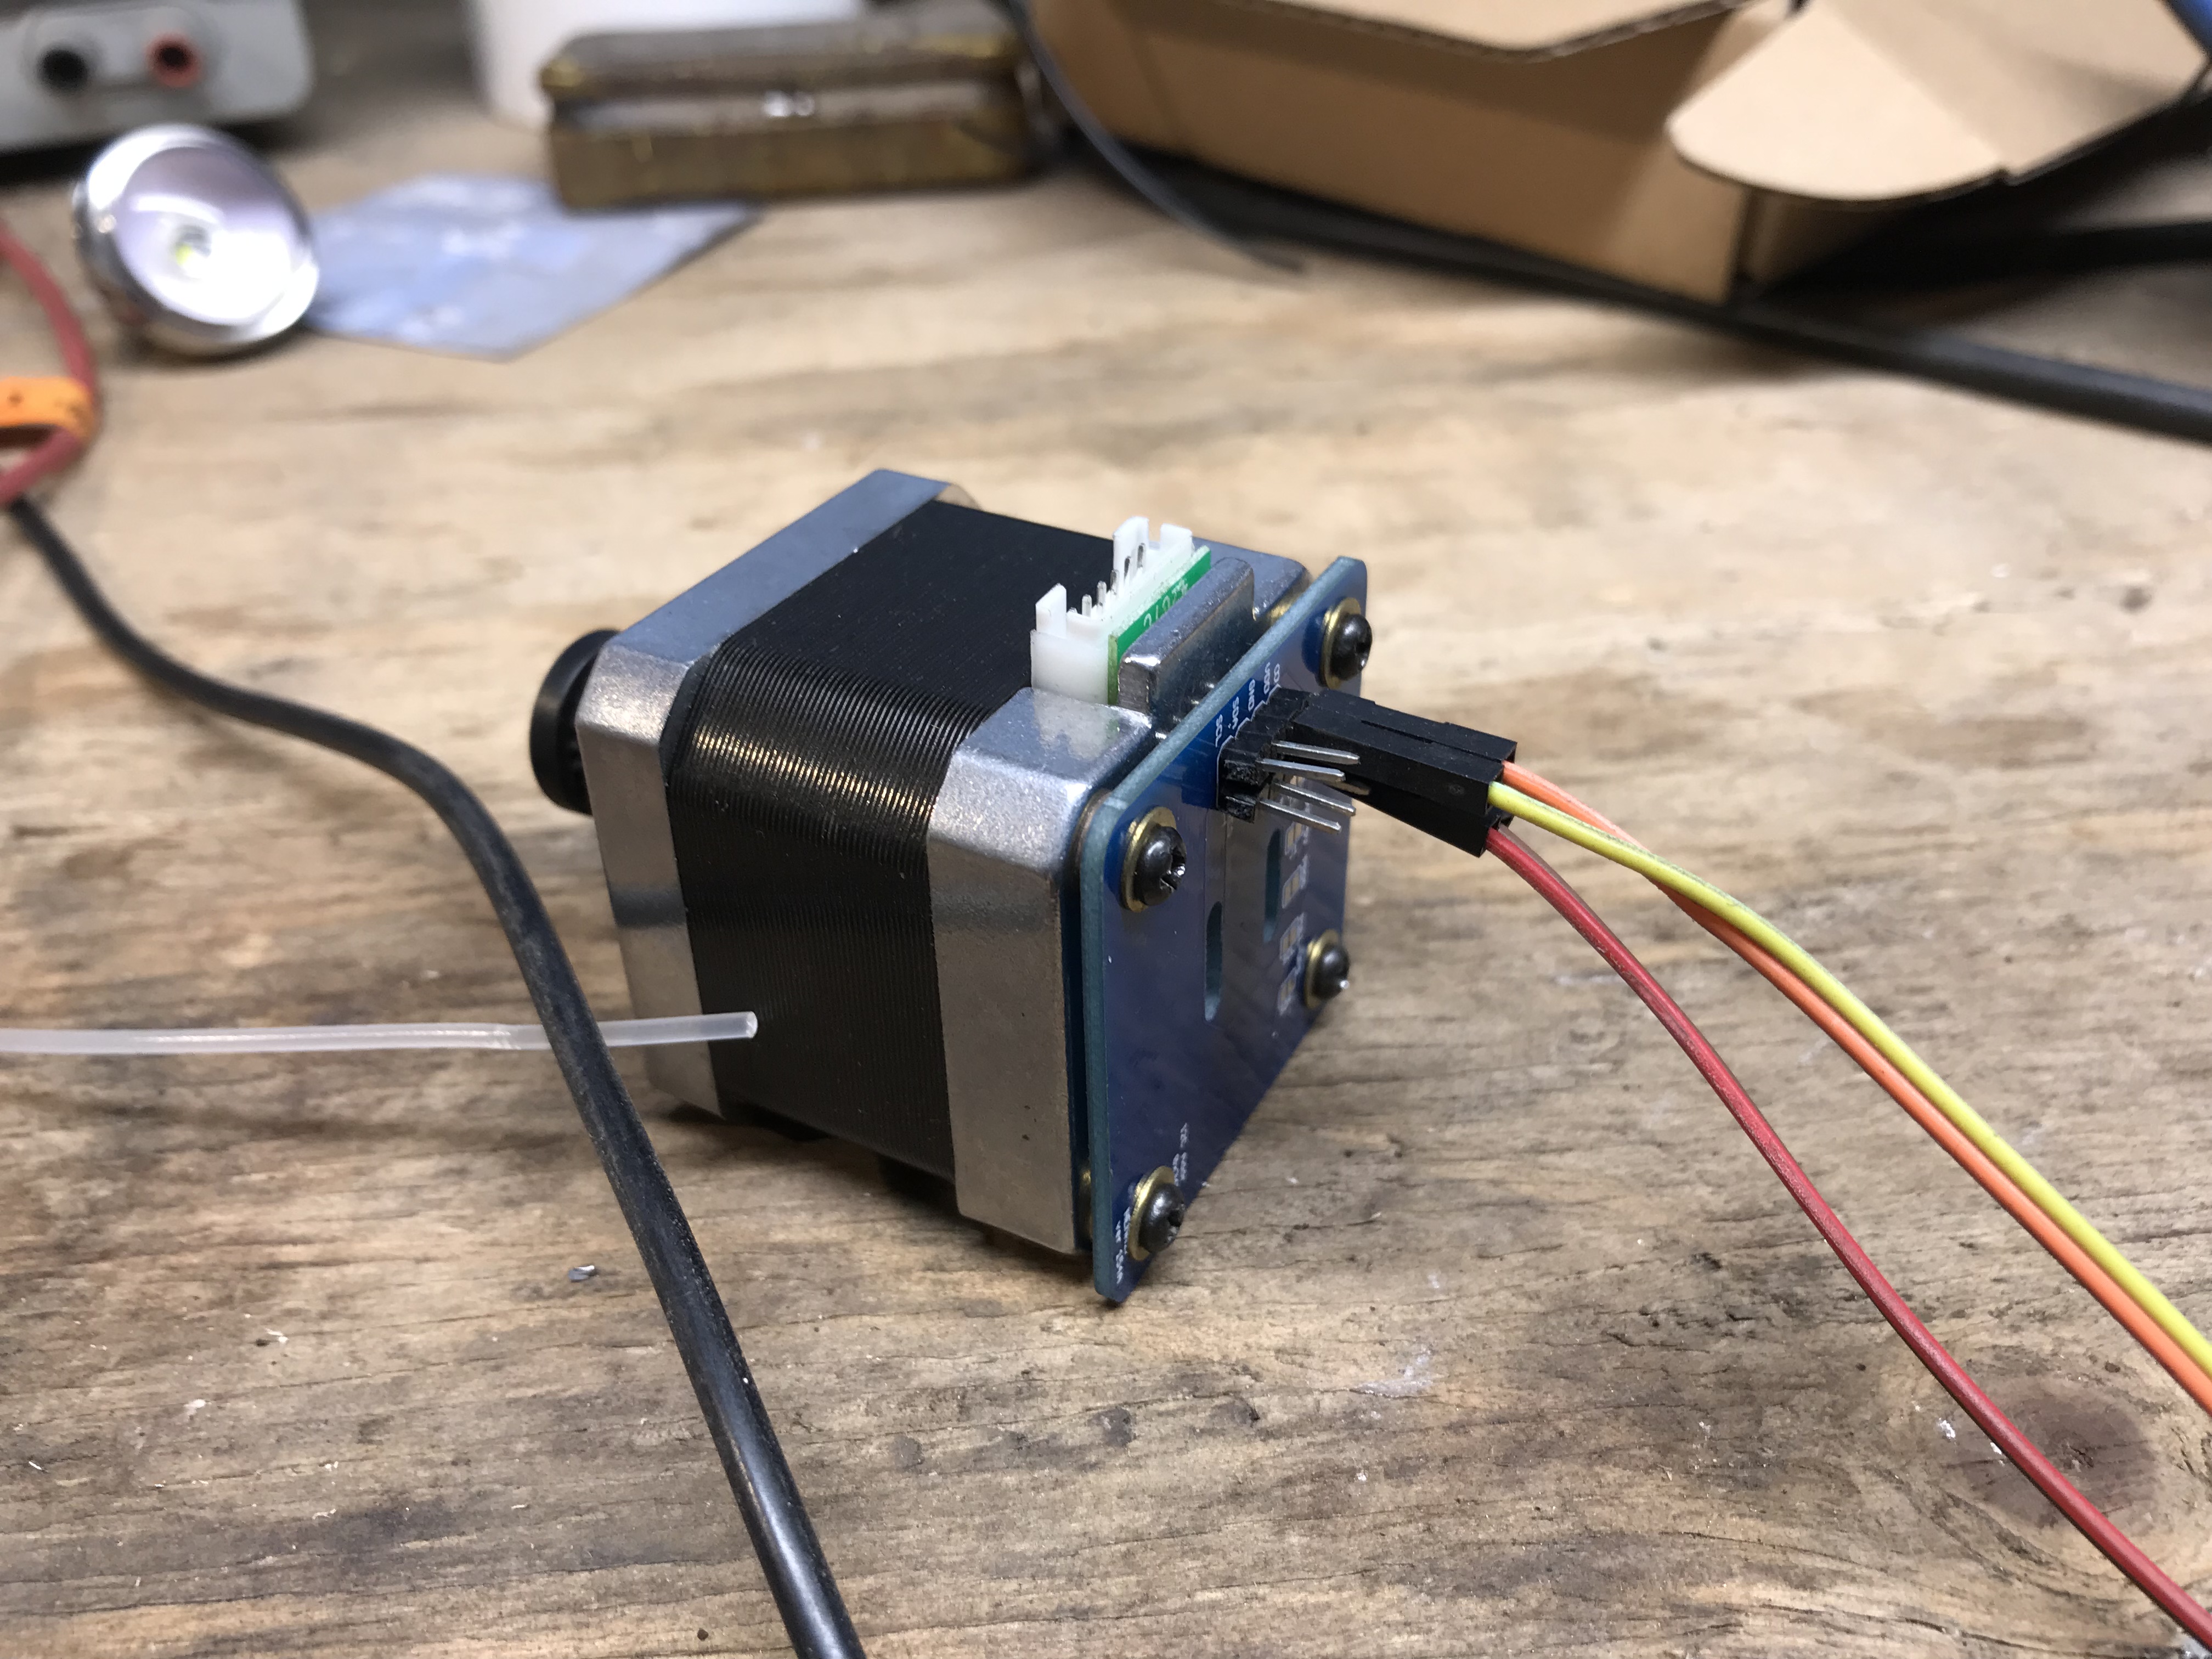
Electronics. Rpi and arduino are flashed and connected to the web app. i am putting a ‘first stab’ system together on a board with just the rpi,arduino,steppers,and relays just to get the software configured as much as i can on my desk before intorducing it to the frame. i will probably keep this board as dev platform and duplicate it for both frames when the time comes.
Learning to make it work practically.
Well now. that i think is the hard bit. Will i be able to grow enough for a family of five and for how much of the year will that work? how much down time will there be? can it grow useful quantities all year round? will it take more time to manage the farmbot than it would to work my job,earn the cash and buy the food? most importantly will the missus love or hate it?
So if you are still reading then im impressed! that was a hell of a ramble, hopefully the longest i will ever post.
cheers
tanc
I hope you don’t mind comments in here ![]()
Thats a good plan, reminds me of the good old days when I built my first farmbot mostly from the BOM. Maybe the outdated V1.0 docs would be handy for you ![]()
@Ascend hi Richard, no i welcome all comments! cheers and good to know about the V1.0 il look at them now.
It’s good to see that you have some help there. Is the washer in the photo that you have on the X axis, seems to be protruding down into the channel. Is that to prevent lateral displacement?
Y axis ?
Thanks John. I was suggesting that the purpose of the washer is to prevent displacement on the X axis, but as you astutely point out, the location of the washer itself is on the Y axis. I should have been clearer.
@dmbgo all good 
In the interests of ever more clarity  would you concur that said washer would partially reduce Y axis drive belt movement in the X axis direction ? ( since the Y axis cross slide motion is immune from unwanted deviation in the X axis direction by the “V” wheels and slotted extrusion )
Hi @dmgbo. I can’t decide if he’s the help, the boss, or a human spanner thrown into the works by the gods of mischief!
Well spotted on the washer. Ideally there would be one on either side of the bearing. The purpose is to keep the belt in place. I can see all sorts of problems here with the tiny gt2 belts falling off the wheels and getting jammed.
I am trying to keep to farmbots design as much as poss but the more I look at the frame size and the machines intended location, the more I am drawn away from certain aspects. For example on the drive train. I think I would prefer a rack and pinion for the x and y axes with the rack teeth on the underneath of the frame. This would reduce the chance of a debris clog, could be printed easily in sections and could make the whole machine easily extendable.
Can I ask do you have a machine currently in operation and if so can you give me any idea of how much time it takes to run and maintain it? And how much produce you get from it over how much of the year?
Cheers
Tanc
Hi @Ascend , Morning Richard, I have just looked at the v1.0 and I am interested to know why the design moved away from the single x motor and drive shaft? Also do you have any pics of your machine? Is it still in operation? Is /was it a genuine labour saver? Do you still have to buy veg! How many people does it feed?
Cheers
Tanc
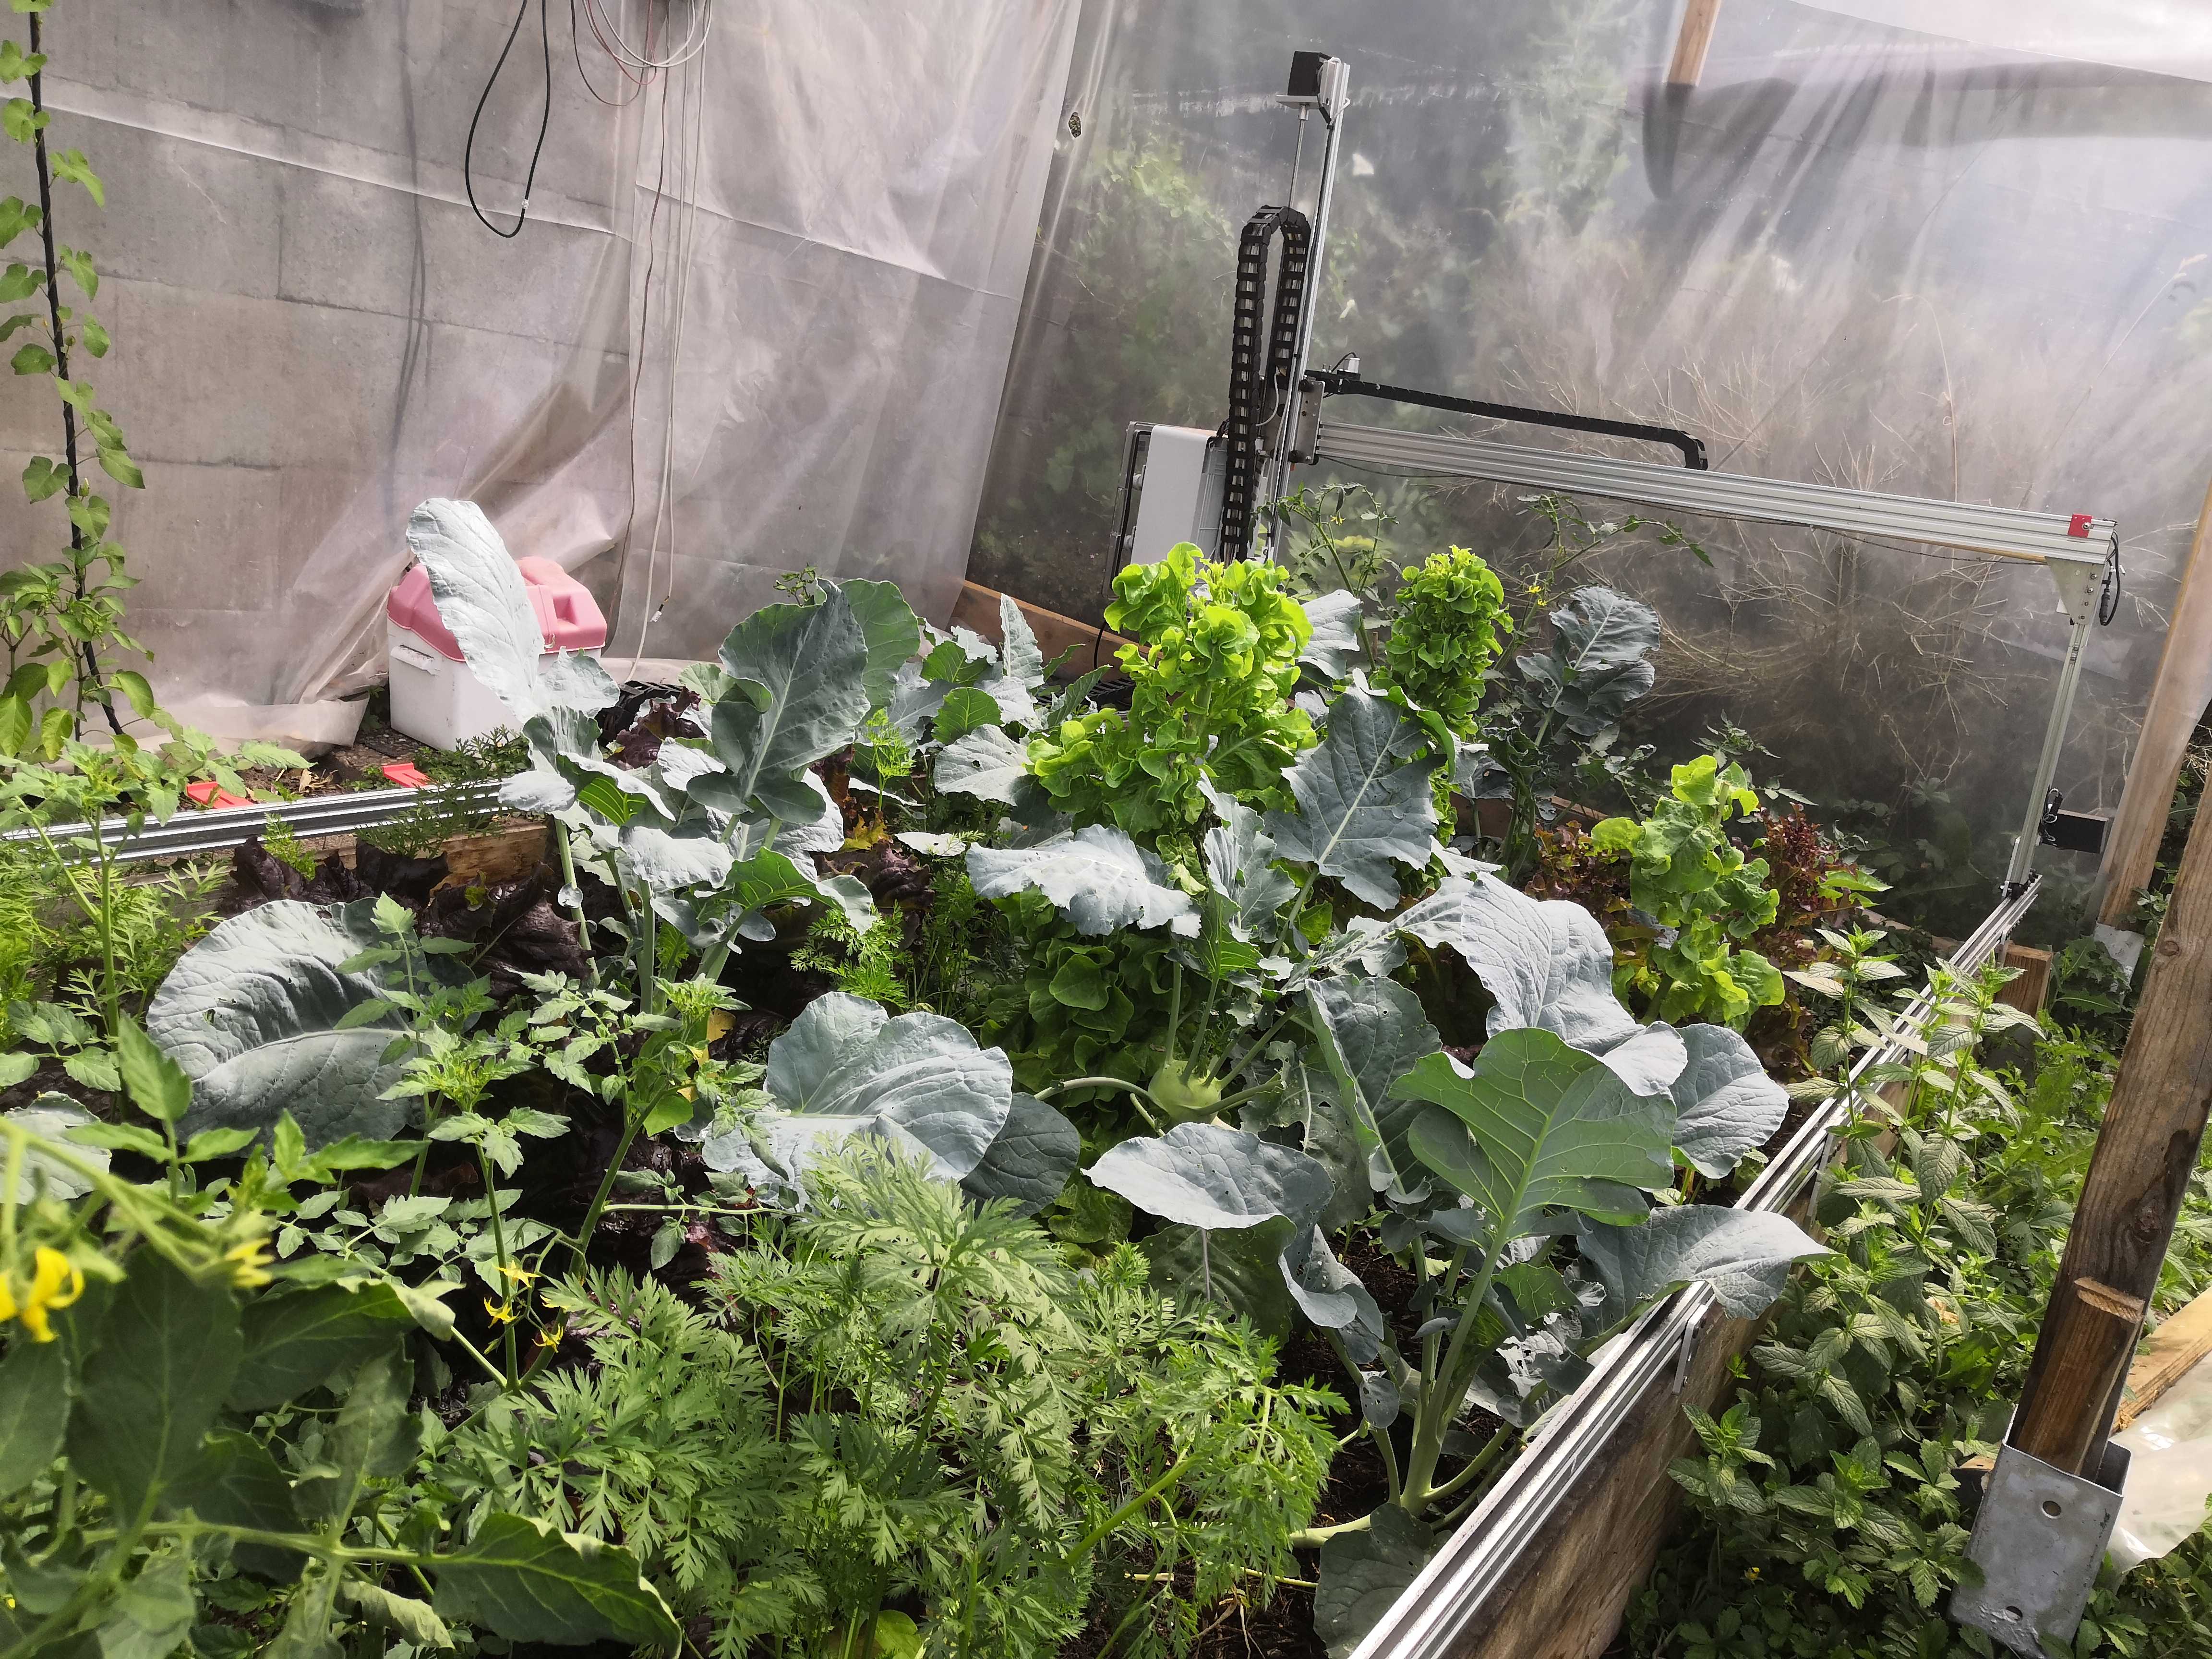
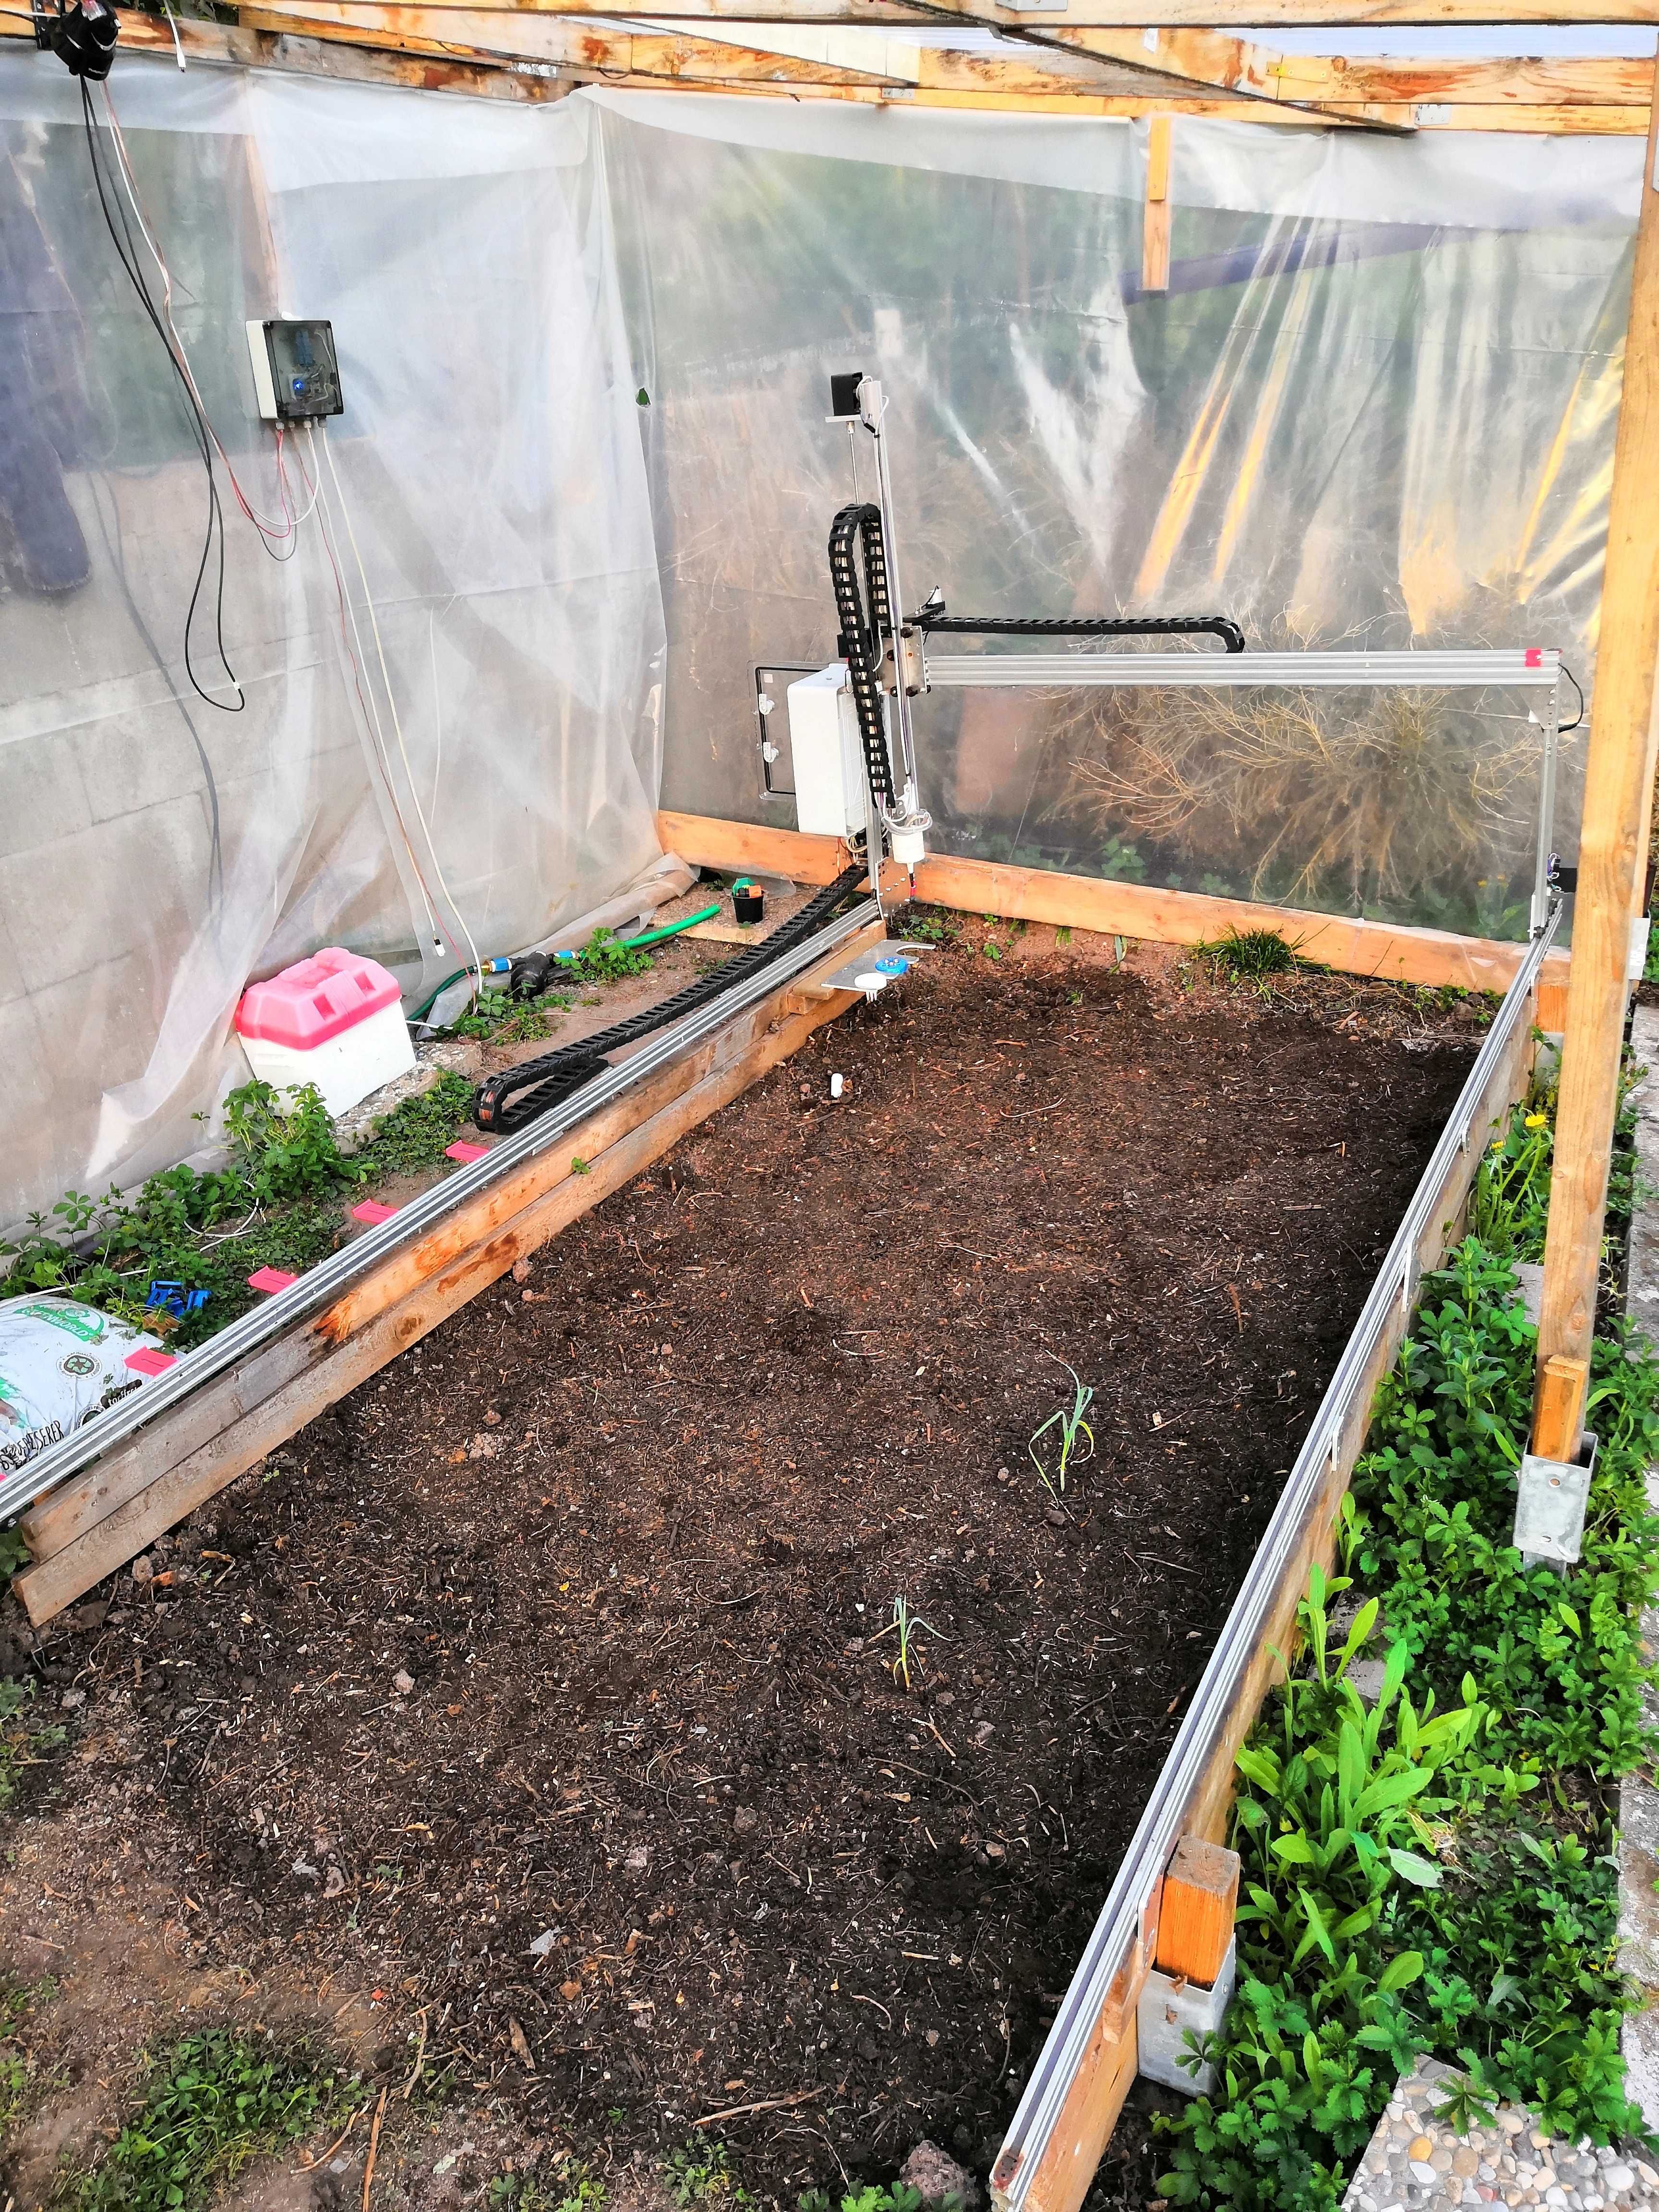
Yes my farmbot has been working for a few years now. It is a version 1.5. I have had no issues with the belts coming off on this iteration.
The farmbot used the encoders to monitor the position of each axis and they seem to work well.
I tend to use the farmbot mainly in the growing season - springtime until late autumn. I have used it every year, but it is really just an addition to our normal vegetables. I grow things like tomatoes separately. I did try to use the farmbot to water tomatoes one year, but it wasn’t really successful, the plants were a bit shaded. The rails sit above the soil and I haven’t had any issues with them clogging. The only maintenance I have done is to try to reduce the water pressure and to replace the hoses, since the daily movement and the harsh Aussie Sun, take their toll.
Yes I would concur John, but does it matter?
Great question, the main reason was to make the assembly easier and so gain more torque from the 2nd motor. So turning the driveshaft from a single NEMA17 motor caused movement issues that were reduced with the double motor setup. Here you can find the Changelog.
First of all, I’ve never had the intention to grow vegetables in first place as it was more like a hobby beside 3d printing and cnc milling. The device is still operating and grows things every year, but its not effective to be really efficient. Each harvest is just nice to have, but nothing you can count on. Right now the device is placed directly on the ground without a raised bed, thats probably one of the biggest reasons why plants don’t like it that much.
@dmbgo, thanks so much for the info. i guess to make it practicle one needs a huge system, like the XL models. one thing occured to me is that a DIY custom build can be made to fit the garden that i have, whereas a kit from FarmBot comes in only 2 set sizes. The UK is not known for its abundance of space. My patch is 3.5 m wide and 5m long.
I will continue my search for a way to make this work but so far its not looking too rosy.
all the best
tanc
Morning Richard,
thanks for the insights and your pictures, can i ask what is the advantage of a raised bed and why do the plants not like being on the ground? i had assumed that the raised bed was beneficial purely for the operators convenience but maybe there is more to it?
cheers
tanc
This topic was automatically closed after 30 days. New replies are no longer allowed.