Hello,
i work on my barchelor degree thesis. I am creating new head for Farmbot. I have a prototype but i struggle with controls. My head uses MG995 servo. I have it connected to UMT, all pins are ok, I can meassure 5V on A pin, with ground on B. Servo has wire for PWM modulation. I am trying to send a signal to it, via “Control Peripheral”, but i found out my servo can only receive PWM with 50Hz PWM period and Farmduino sends 490Hz or 980Hz. Any suggestions how to make it work? Best case scenario, how to send it PWM with 50Hz period?
First option looks like the easier way. Can you please tell me more about that custom.hex file? First time i hear about it and i have no idea how to make it work or even what should i write in that file. Any help or advice will be greatly appreciated. Thank you.
You’ll need to understand the FarmBot Arduino MCU code ( C++ ) then make your code changes to get 50Hz PWM Frequency and then build your custom MCU firmware and deploy your new .hex file as mentioned in the Developer Docs.
The process above becomes easier with some practice
FarmBot OS has firmware pre-installed with the “expected” Farmduino code. Some users, such as computer programmers with special needs that FBOS does not address, want to use their own modified version of the firmware code because they need it to behave differently than the default firmware that comes with FarmBot OS.
If you need to make a special firmware version, FarmBot OS has a convention for detecting custom firmware builds.
The device powers on.
The device checks the boot partition (FAT16) of the SD card for a file called custom.hex.
If the custom.hex file is found, FarmBot OS stops using the default, pre-installed firmware version and instead will install the contents of custom.hex (AVR assembly code) onto the Farmduino board.
After some discusion we came to conclusion that i probably use wrong servo. My current servo documentation is here: mg955_servo_documentation.pdf (269.5 KB)
I also have an option to use this one: DL3017_servo_documentation.pdf (121.7 KB)
Would it be easier to control?
Again any advice will be appreciated. Thank you
I have not used that one so I cannot say for sure. The firmware uses the standard servo.h library, so if it is Arduino compatible it will probably work with FBOS.
Another question: Did you put a WAIT statement after controlling the servo? Some users forget this step and see movement issues as a result.
Yes, i tried WAIT statement with up to 2000ms, but still no luck. I will buy second servo and post my results later. I really hope this one will me more compatible.
So here are my results with new servo. Still no luck.
I have it connected like this:
A - 5V
B - Ground
C- Tool Verification
H-PWM wire
I send Analog signal with Control Peripheral on Pin 44. Nothing.
I also tried
A- 5V
B- Ground
C-Tool Verification
E- PWM
And i send signal with Control Servo on Pin 5 and no luck. I also tried a lot of different variations of UMT pins and sending Analog signal to them, but no luck. Any suggestions please? Thanks!
I’ve been using different kinds of servos with my custom tools, mostly MG996 and small 9G/16G servos. Unfortunately I’m not using Farmduino boards, but its technically the same.
Where is your “PWM wire” connected on the farmduino?
What version of Farmduino do you have?
Maybe you can show us a picture of your farmduino
Oh wow i think i realized the problem. I send pignal to pins that are not connected to anything?
I expected my PWM wire is connected to Farmduino over UMT, when i connect it to head base. I found this https://genesis.farm.bot/v1.5/Extras/reference/pinout-references so i use it as a reference.
We have Farmbot Genesis v1.4 not sure with Farmduino version it has. I will say for sure on Monday, Famrbot is in my university lab.
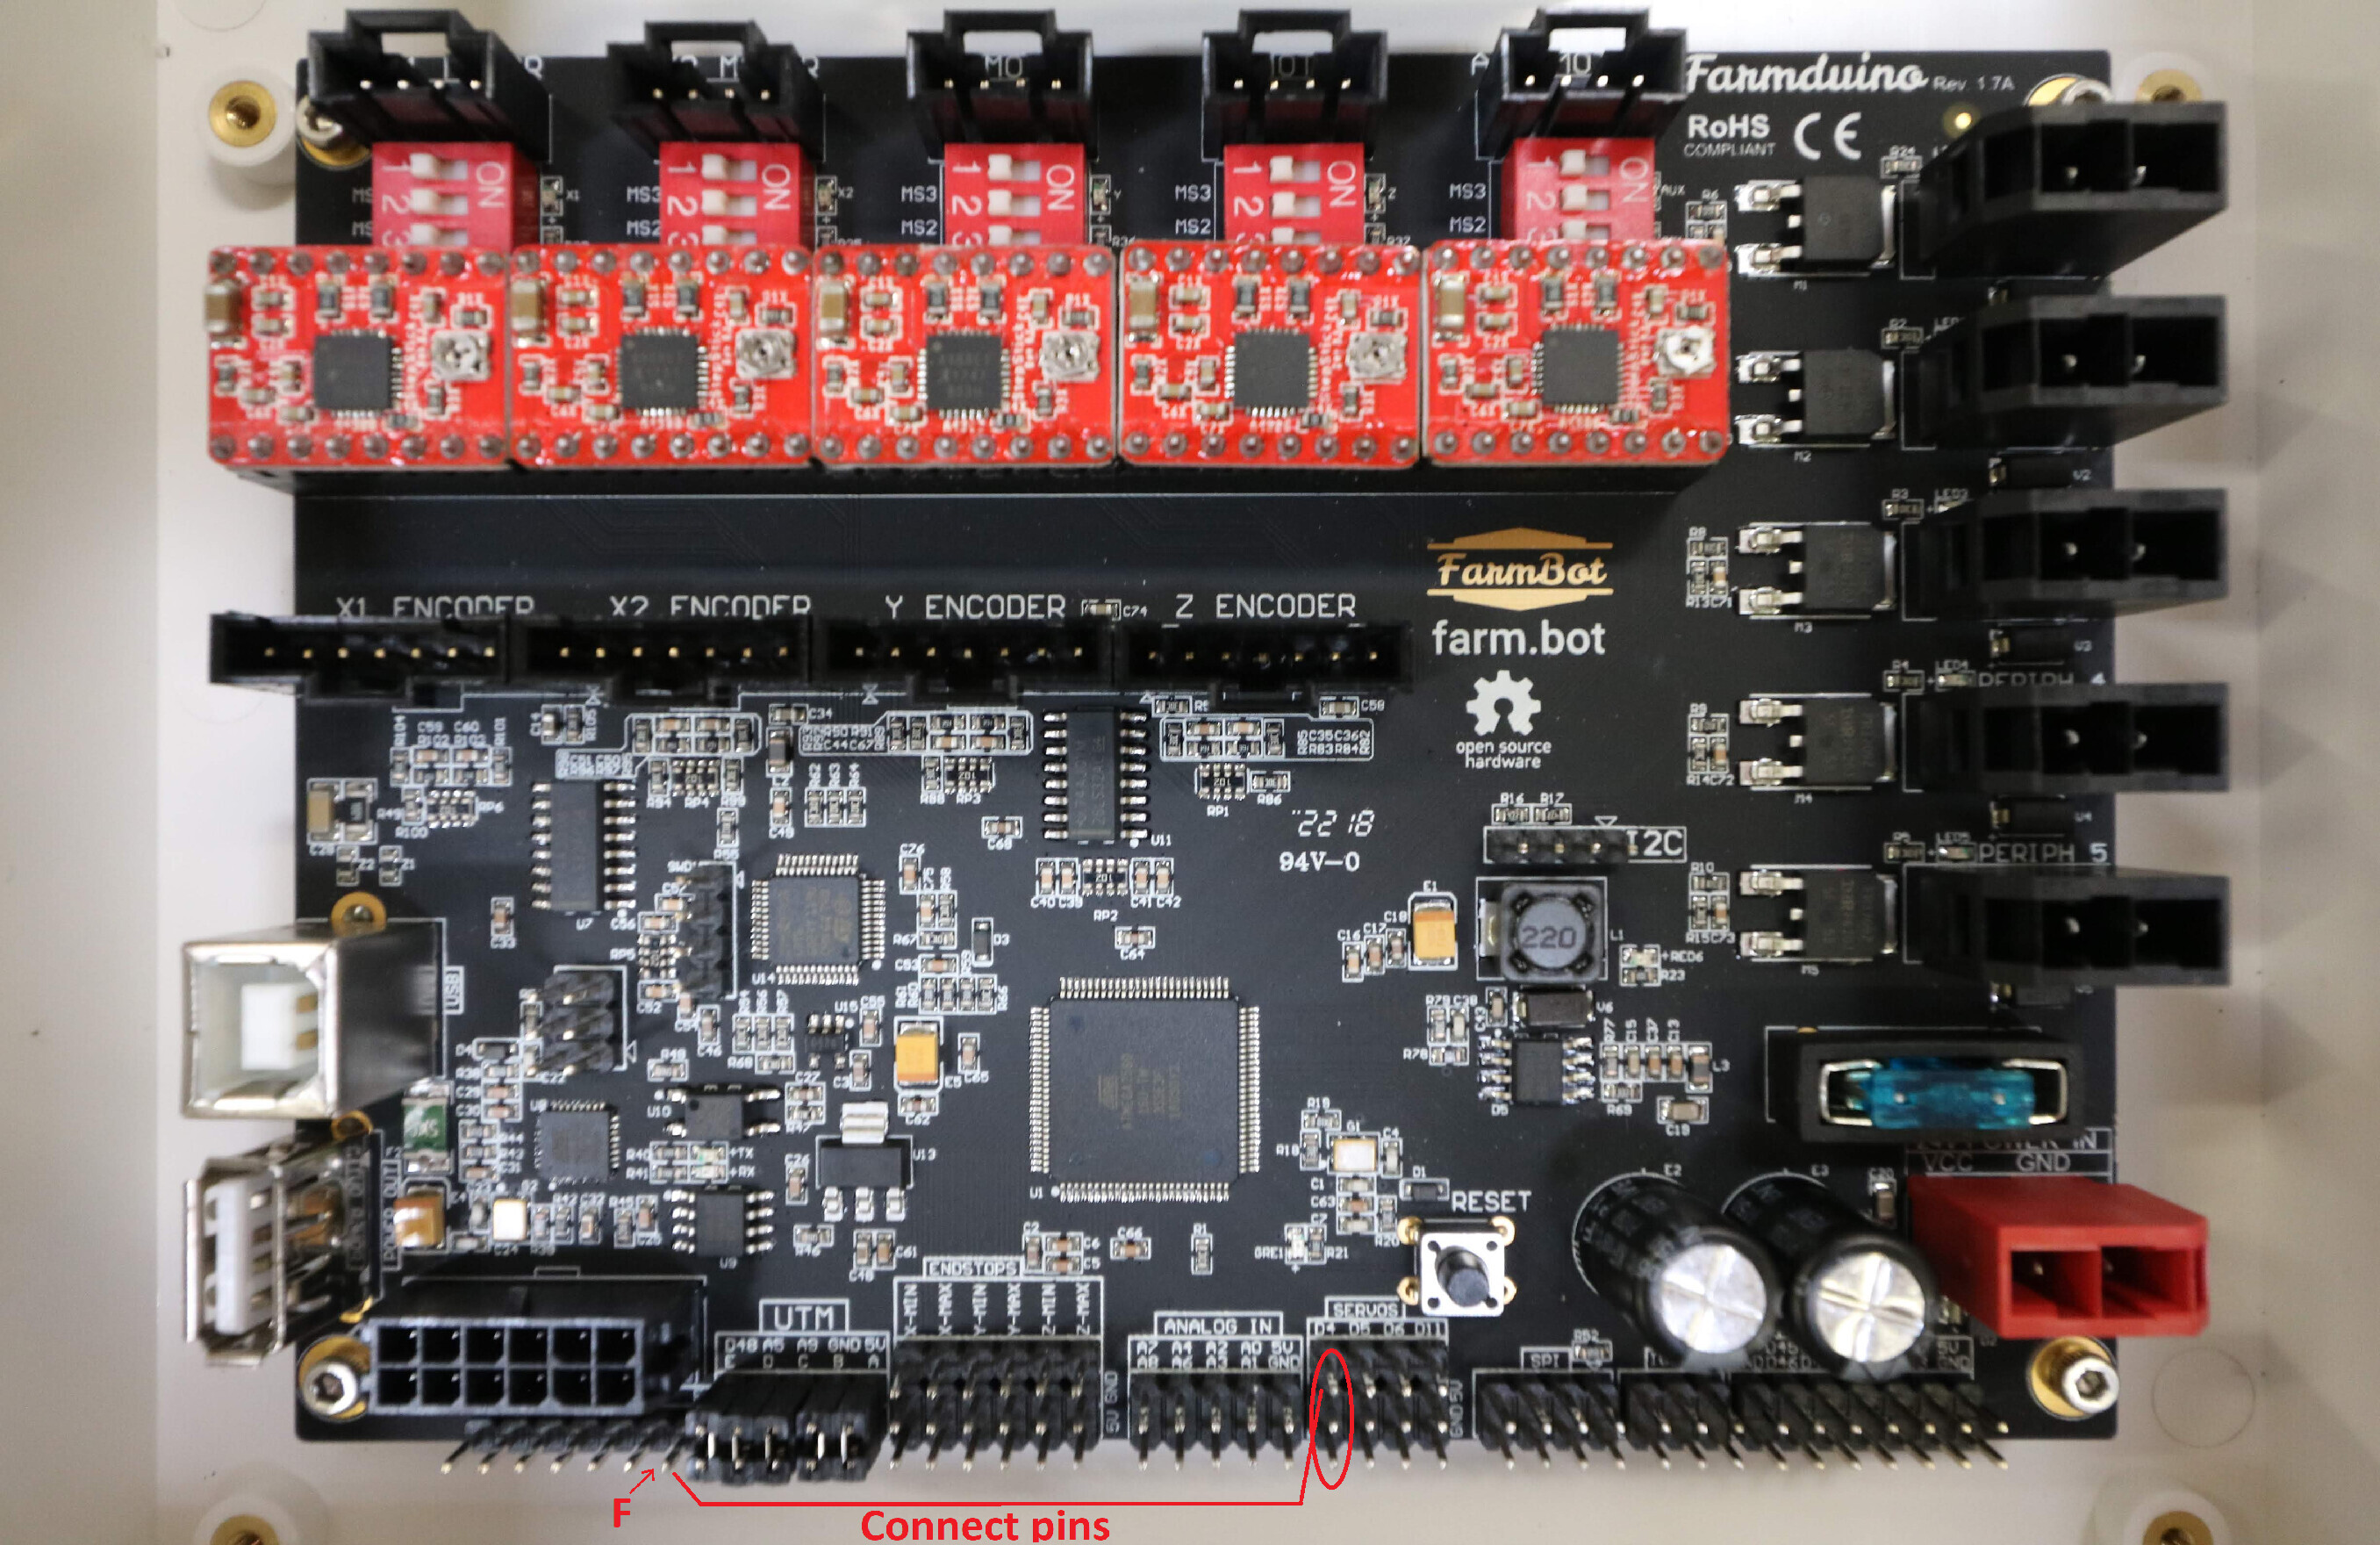
To use the PWM signal from servo pin 4 on the UTM pin F, connect the pins that I’ve marked on the picture. This is just an example, obviously you can use any other UTM pin that is not used yet.
but could not get it to work with UMT with connected pins, but that might be my mistake, my connection was a bit ghetto, i will test it out more with proper connectors.
Servo moves clockwise, but i could not figure out how to make it move counterclockwise. Any suggestions on that?
Thanks a lot! I would never get that far without your advices.
@MarHell I don’t know which servo you are using specifically, but you may need to check that it can move in the direction you are trying to move it. Most servos cannot rotate beyond a full 360 degrees.
I use the MG955 servo, but i still have some weird issues. I have my servo connected to Servo 4 pins. I just can get it to work with UMT, event with connected Servo 4 control pin and UMT F pin like in the picture above.
When i use Control Servo even with 1 degree, servo just starts spinning a does not stop. Same problem is that it always spins in only one direction, a just can´t get it to move backwards.
Okay turns out my servo was the problem i used SRT DL3017 and i works perfectly So thanks everyone for help! Now i just have to finish my thesis and i will post what i did and how it works, if anyone would like to try for themself.

 i used SRT DL3017 and i works perfectly
  So thanks everyone for help! Now i just have to finish my thesis and i will post what i did and how it works, if anyone would like to try for themself.