When designing the raised bed for my FarmBot I decided to add a 2x6 around the top for decorative trim. This board had a small overlap on the inside and a large one on the outside. As I found much further into my build  FarmBot comes with brackets that only support a mounting to the side of a box or planter. I tried to adapt these to my raised bed design, but it led to further problems with the z axis not having enough length to reach down far enough.
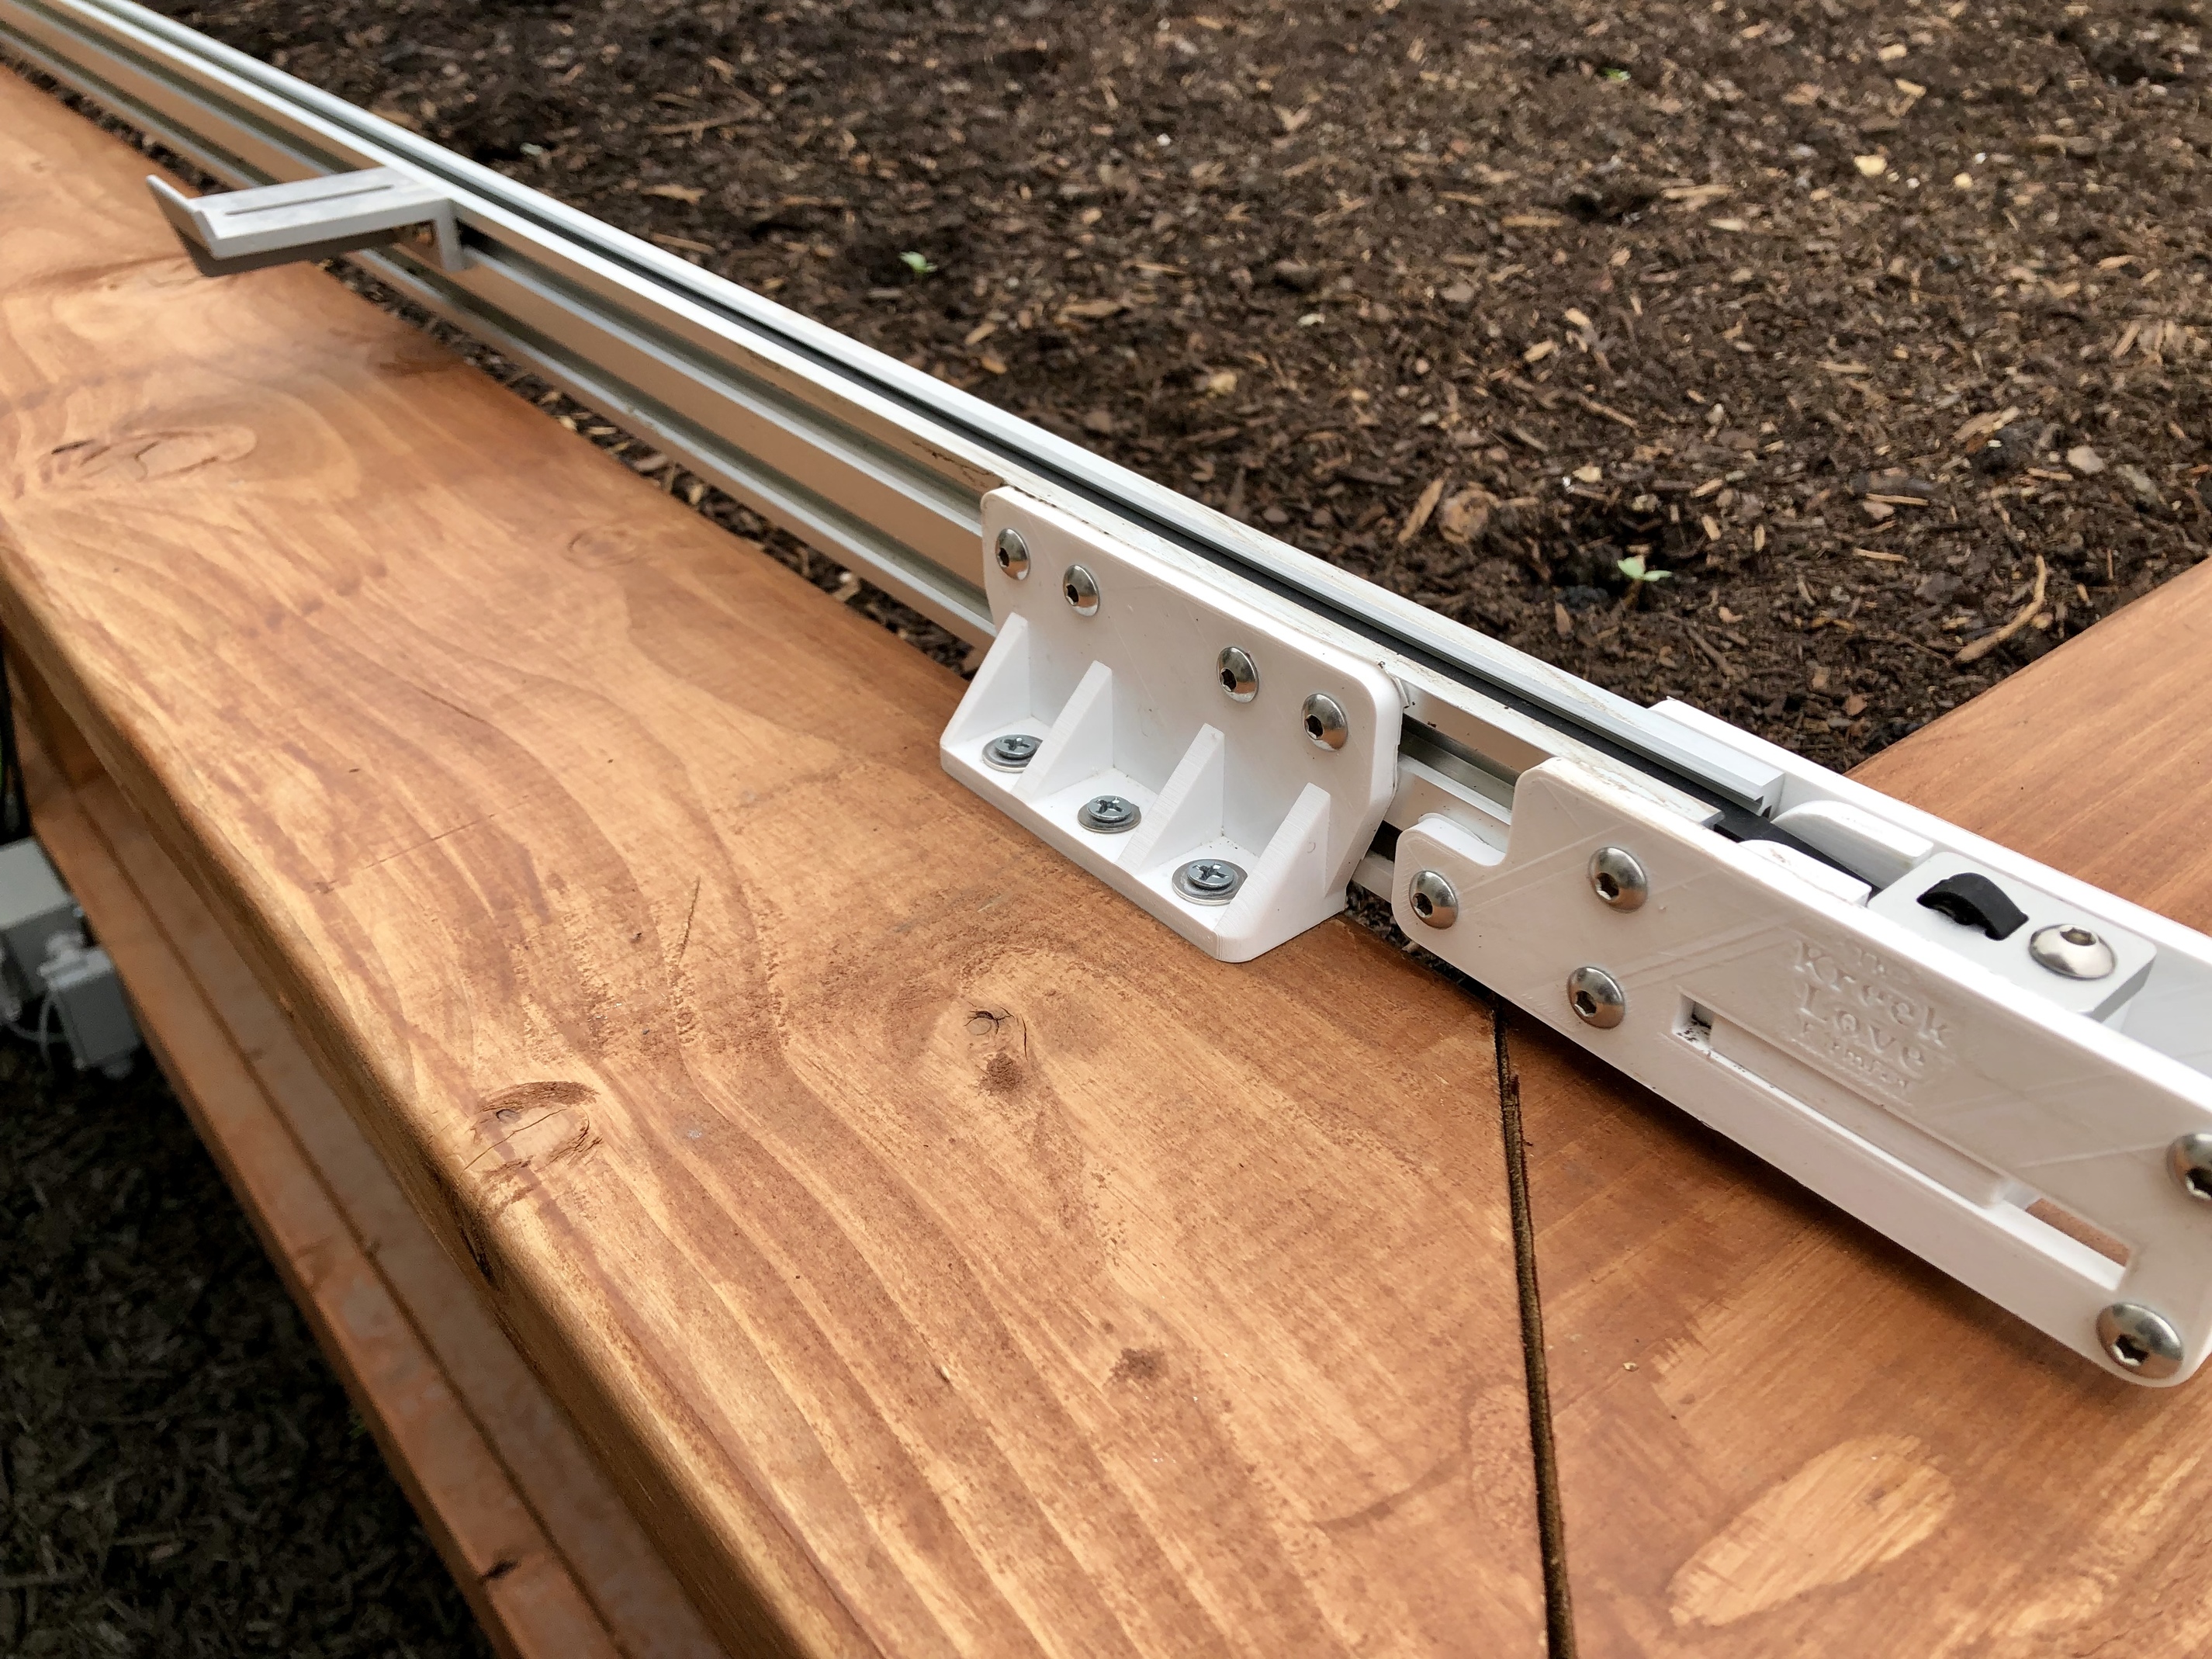
To solve this issue, I took the original design of the center track plates, bent them for surface mounting, and added structural supports so I could feel safe about 3d printing them. The design also uses “pills” instead of drill holes for the surface mount screws to assist with fine adjusting the tracks when squaring the unit.
You can check out my design and print your own too.