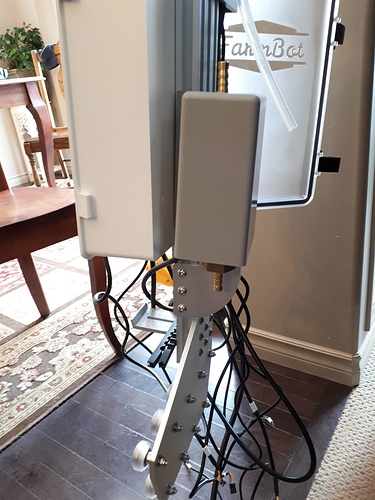
@roryaronson @RickCarlino @Gabriel
We are almost done assembling our FarmBot Genisis XL and it is going great!
The build has gone well, and the hardware documentation has been very good, for the most part.
The only parts that have caused us concern or confusion have been around cable management and wiring layout. What would help, I think, would be photos of what the result should look like at a few key steps.
Here are those steps:
1). When placing the cables into the cable carriers. During and after. Especially where the instructions note to avoid “criss-crossing”, as this is very hard to do on the Z & Y cable carriers. One thought would be to recommend doing it on a hot day so that the wires & hoses are more pliable. (Or cautious use of a hair dryer or heat gun)
2). After plugging in all the wires to the electronics box, we are left with quite a bit of extra cables (slack). It would be helpful to have the “FarmBot-Approved” way of managing the slack. I want to ensure that whatever method I use does not impact the functionality of the robot.
3). All the CAD drawings note “Not Pictured: The cables and tubes…”. It would be highly beneficial (imho) to have at least a CAD, at best a picture, of the end result for each of the cable carrier ends, with wires & hoses.
One other part that was tricky was plugging in the two electronic connectors to the UTM. There is not enough space to get it there and the insulation to the main cable is pretty close to the plugs. Thoughts would be:
1). Provide some type of tab on each plug that one could use to better guide and insert each plug.
2). Fuse the two plugs together so that they can be inserted as a single unit. I was about to super-glue them together, then insert them as one piece, but I managed to get them in separately.
3). When constructing the cable, separate (unwind) enough of the individual wires so that the two plugs can be moved around with greater ease. Because the wires are wrapped close together between the end of the insulation & the plugs, it made moving the plugs to orient them on their respective locations on the UTM a bit of a challenge.
And one more thing…
About the electronics box:
1). It would be a nice-to-have a tab on the door & box for adding some type of locking mechanism. (Small padlock, zip-tie, etc. Nothing elaborate, just enough to keep little, inquisitive hands out and help keep the honest folks honest. I have some long zip ties that wrap around the entire box, but we need to “burn” one every time we want to get into the box.
2). The box looks awesome, but when I close & clamp it, it does not seem like very much pressure is applied to the lid. Maybe on the next build shorten the clips just a smidge to make the seal a bit tighter…?
And yet even another thing…
It would be another nice-to-have a section in the hardware docs titled “FarmBot Build Pictures”, and populate that section with many photos from many angles of the FarmBot. Close up & high resolution. At least for me, this would help me understand & verify each step.
I hope all this feedback helps!
