Hello FarmBot World!
I have a question about the correct setup of the water line components.
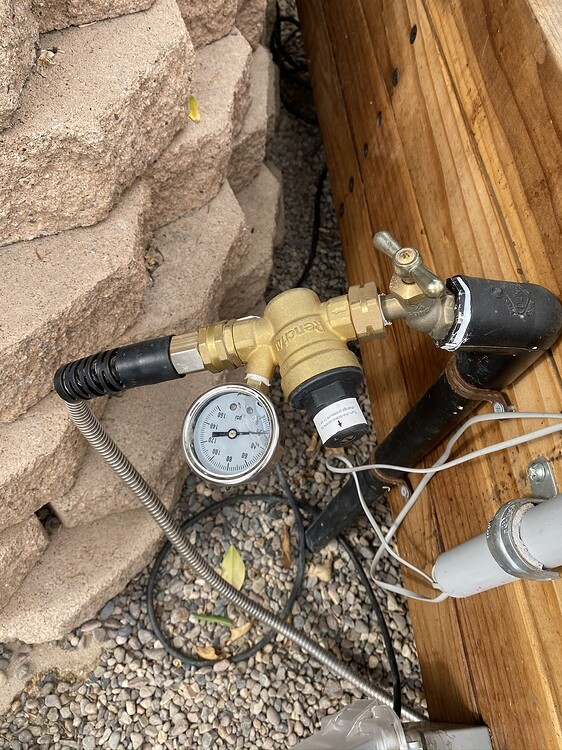
In the “Hardware Documentation”, under the “Tools” section, the “Watering Nozzle” instructions show the pressure regulator attached after the solenoid valve. (https://genesis.farm.bot/docs/watering-nozzle)
Is this correct? It seems like the logical place for the pressure reducer is at the water supply (hose coupling), as this will lower the system water pressure for the rest of the water line. Otherwise, every barbed fitting and the tubbing will be subject to the pressure of the supply line (~100 psi in our area). I do not think the FarmBot water tubing or the barbed fittings will hold over time.
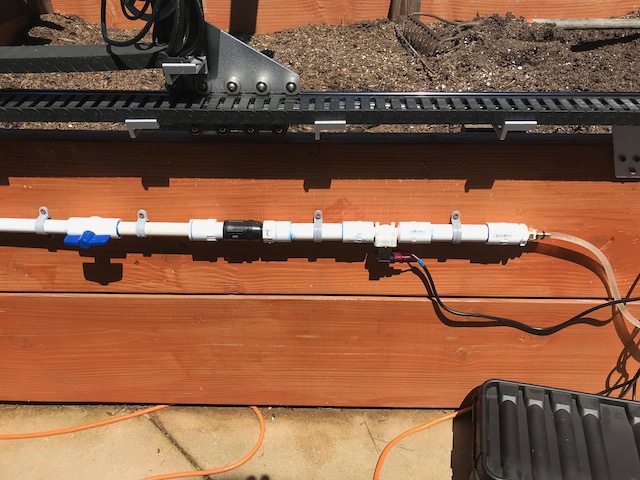
I also have a request for the FarmBot Folks (@roryaronson) to maybe design a 3D model file for a housing for the solenoid valve. I might suggest a rubber gasket or O-ring to seal the hole where the water tube exits the solenoid valve.
Positioning the pressure regulator after the solenoid valve (as shown in the latest documentation) is correct. If you have any issues with the tubing popping off the barbs due to high municipal water pressure, you can use the included zip ties or even hose clamps to better secure the tubing.
In previous versions of FarmBot, the regulator was placed before the valve. However, the pressure regulator we’ve chosen is a spring-based design, which is not designed to handle sustained pressure load. We found this out after several months when the pressure regulators placed in that location began to fail and no longer regulate the pressure at all.
Alternatively, you can also pick up a more expensive pressure regulator from your local hardware store that is designed to handle constant pressure, and install it right at the hose bib. Some of them even allow you to adjust the output pressure.
Regarding a Solenoid Valve Housing: This is certainly a place we can improve the FarmBot design to increase longevity of the system. Right now, you might be able to modify the existing Vacuum Pump Housing by drilling a hole in the top and adding one of the grommets used in the v1.2/v1.3 design. Looks like such a mod has already been done at least once.
Ahh, I did not factor in constant, sustained use. Good to know. I will install per documentation and maybe research the availability and cost of a regulator designed to be pressurized all the time. Do you have a vendor and part number of a regulator you would recommend? Until the, I think copious use of zip ties will be the solution.
I will place an order for another vacuum pump housing and mod til it works, or ends up covered in duct tape.
Thanks!
I don’t have a specific vendor/part number to share, but asking an associate in your local Home Depot type store will probably get you to something that is designed for sustained use.
I’d like to point out for anyone looking for this subject that the v1.2 documentation at time of writing this reply does in fact say to connect the pressure regulator directly onto the tap, which means constant sustained pressure. It contradicts what @roryaronson was saying here:
After reading this thread I’ve decided I’ll try to connect the (v1.2) pressure regulator the “old skool” now-undocumented way by attaching it after the solenoid valve.
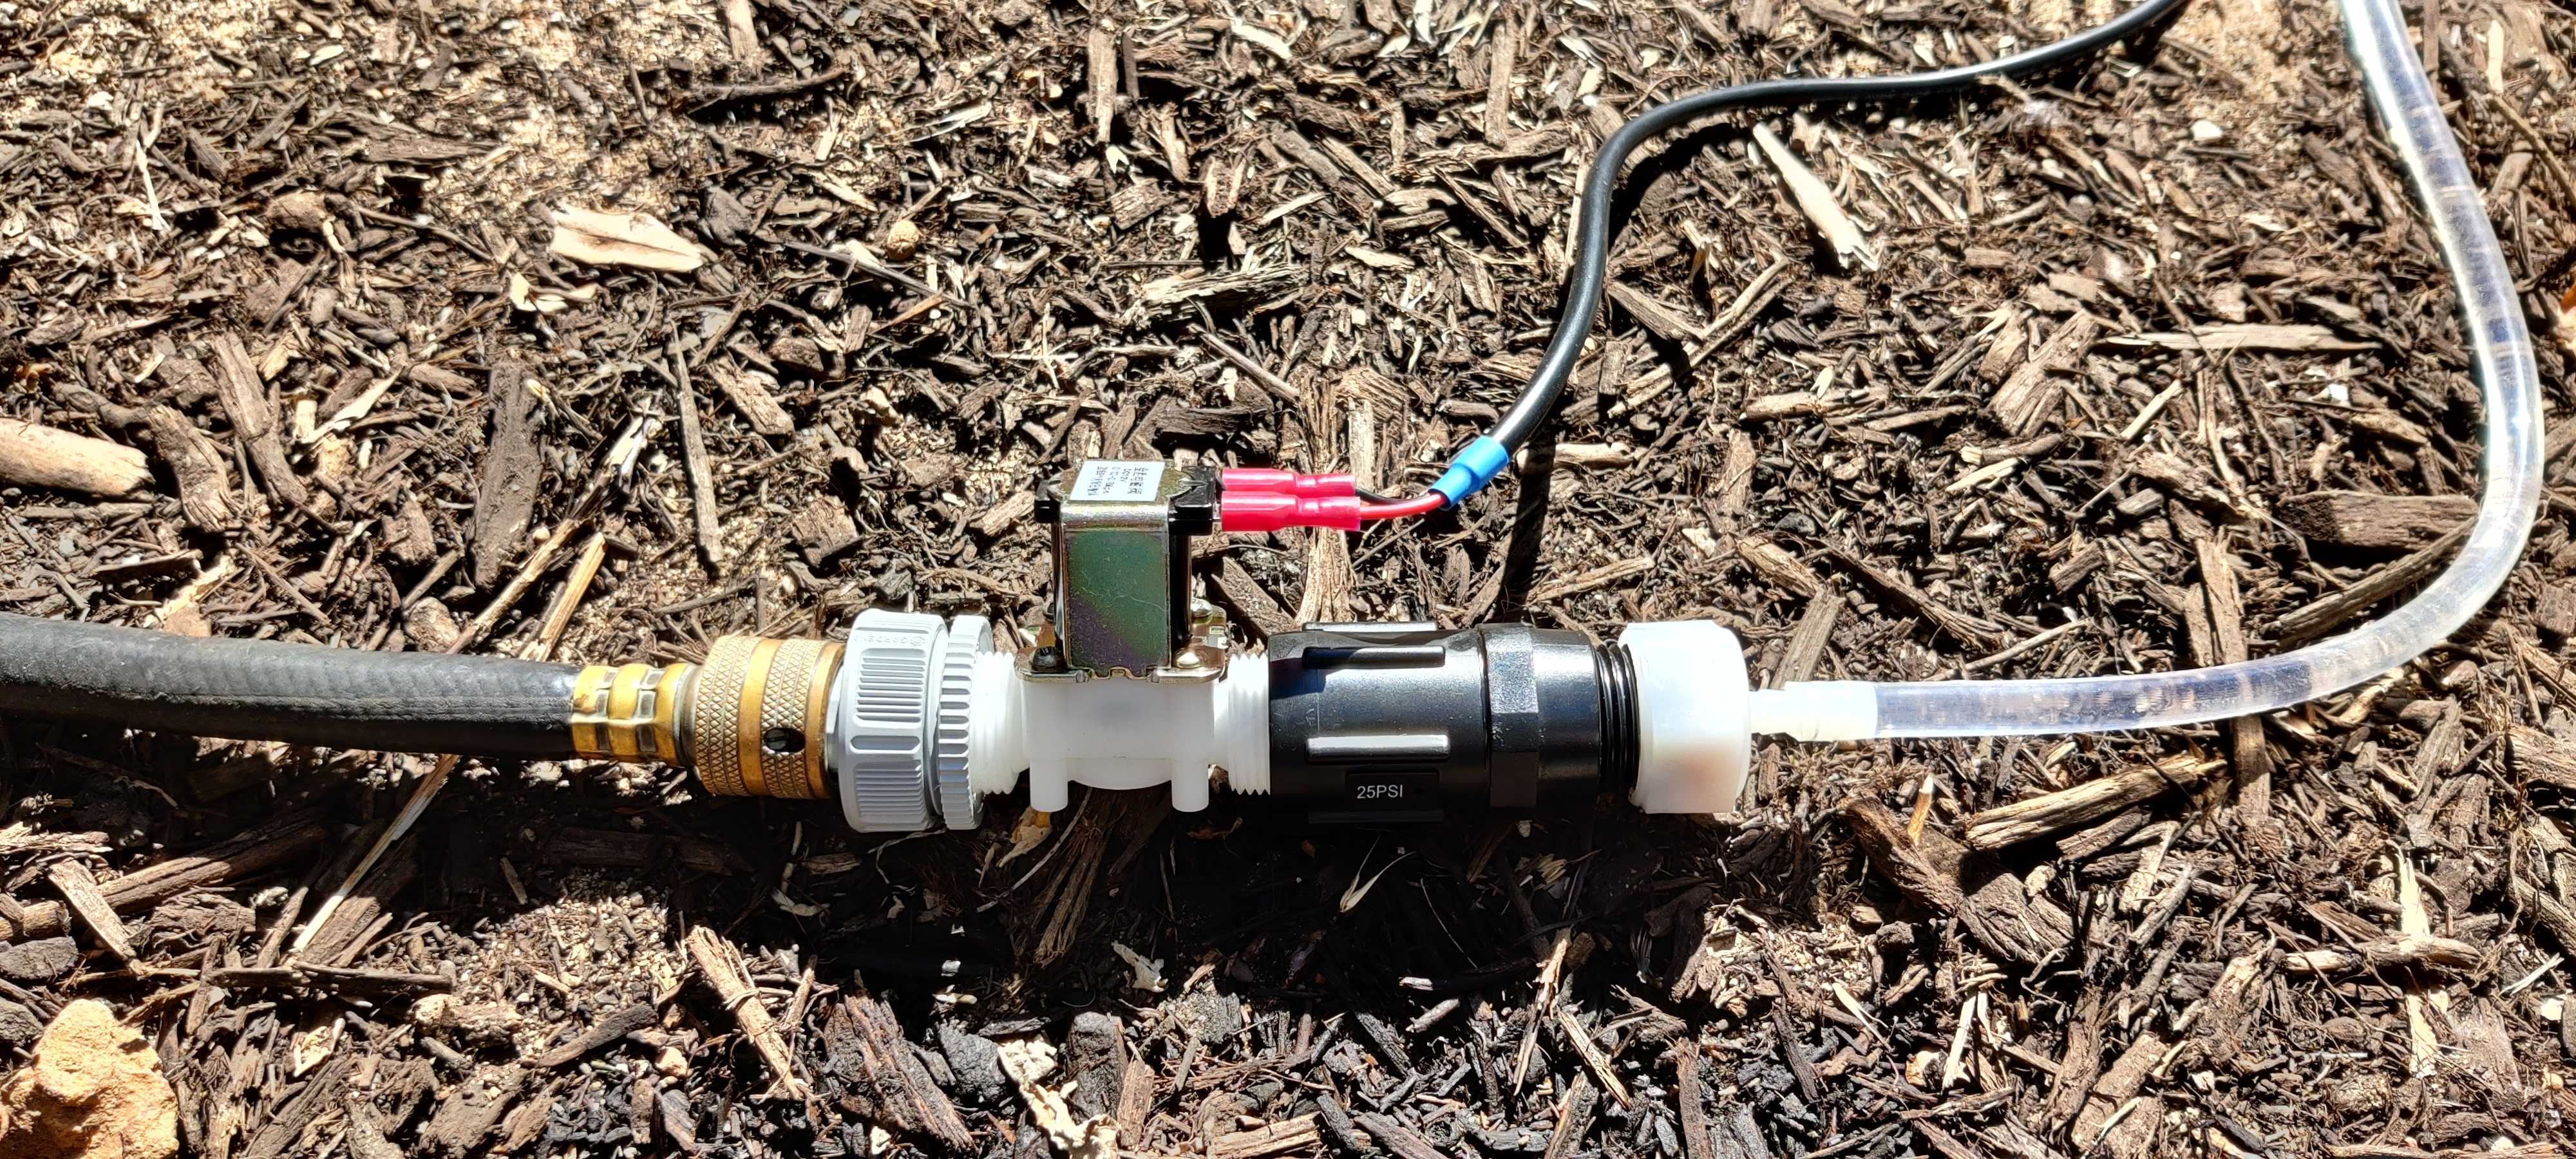
It is also worth noting that the male threading on the solenoid valve does not match the female threading on the pressure regulator, but when adding the included rubber gasket in this location it seems to connect. I suppose the distance it needs to thread is short enough for the mismatching threads to not become an issue, but time will tell once I hook all of this up to municipal water.
But here in Australia (and probably everywhere except USA) the pressure regulator has 3/4" Female Hose Thread which does not match the more universal British Standard Pipe thread. Luckily, the distance to thread is short so although you can feel the threads don’t match, by the time friction kicks in you’ve already sealed the connection Not sure how long it will last…
Being able to adjust the pressure from our municipal water source solved all my problems. It’s just a water pressure regulator you can get at most hardware stores or on Amazon.
This is how I kluged things together for my farmbot. The original nipple adapter would not seal on the solenoid threads. So I dug through my spare irrigation parts and made this. (plus purchased a brass fitting for the plastic hose.)


 Not sure how long it will last…