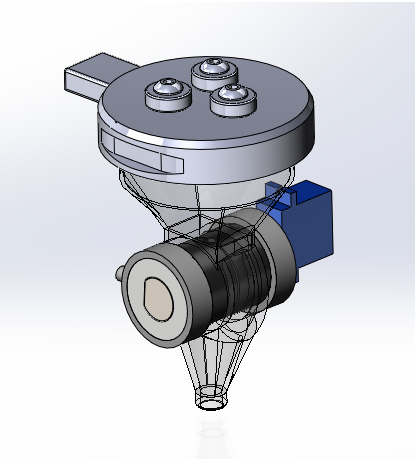
I am excited to show you the latest prototype seeder tool for the FarmBot designed by Liberty University. The intent of this tool is to allow users to drop pelleted (spherical) seeds directly onto specified locations in the soil.
The design is based on the classic seed drill design (Jethro Tull c1701) with a slightly more modern flare.
Specific Design Details:
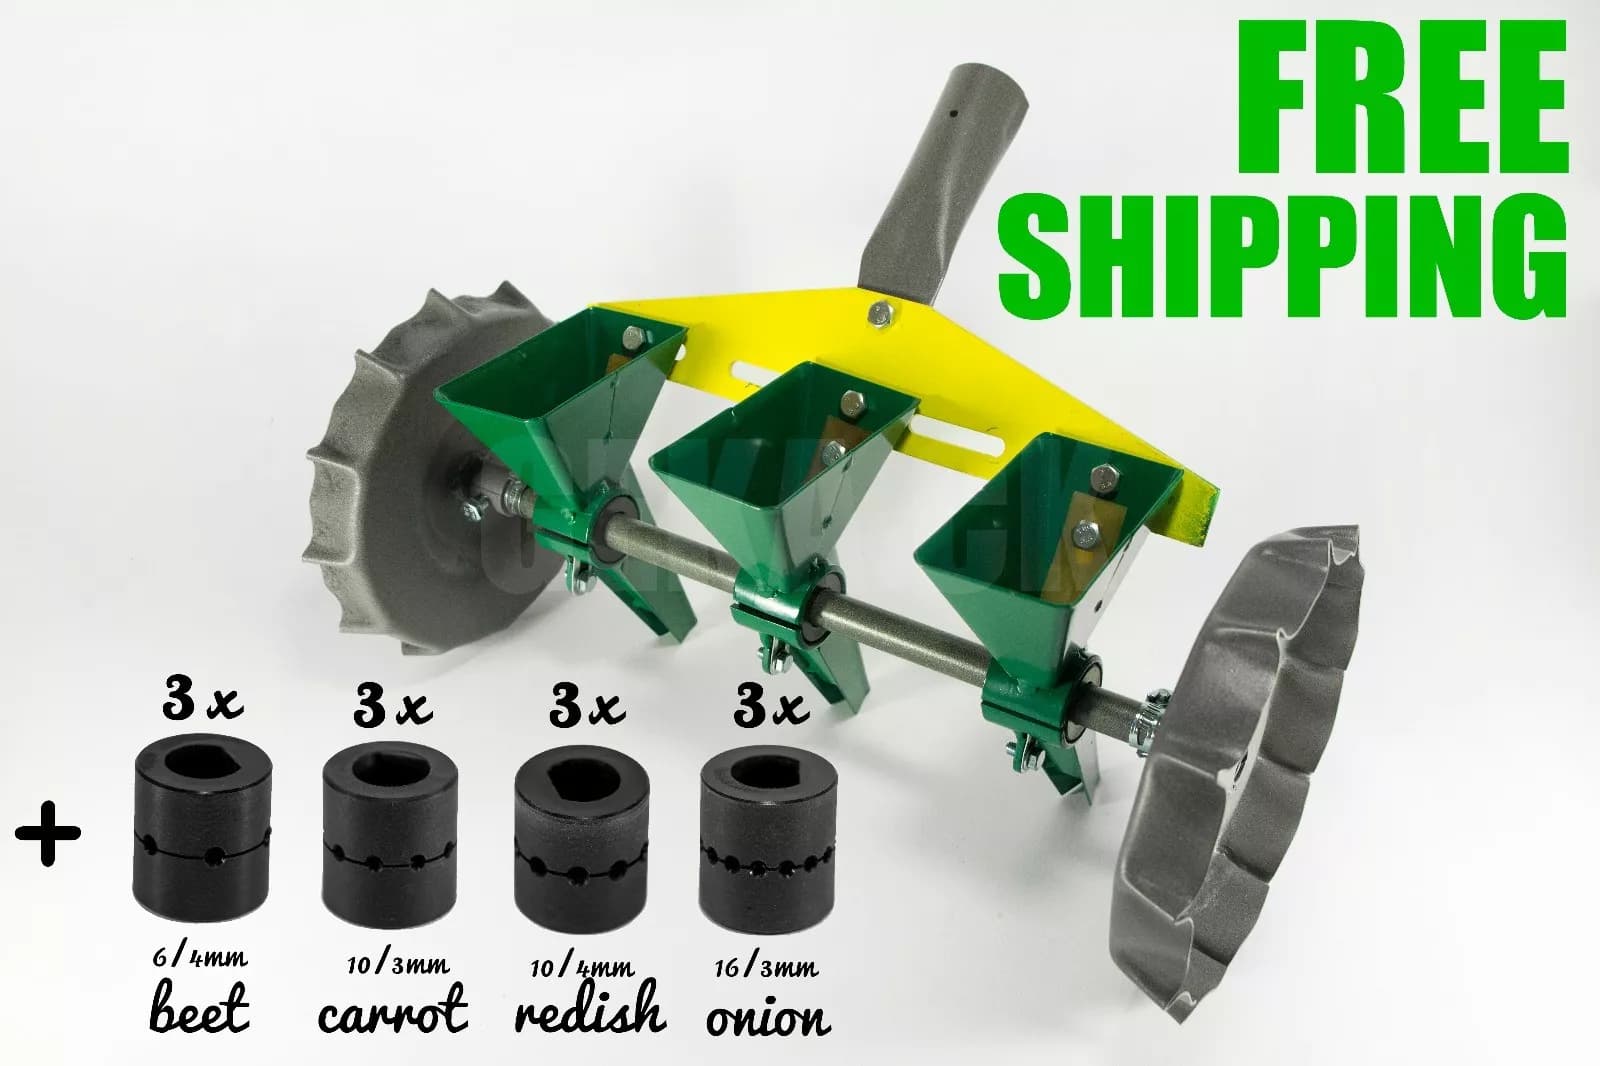
Capacity: The seed hopper will contain between 50 and 100 seeds. Utility: The turnstyles will be interchangeable so you can can work with different seed sizes. Accuracy: The seed will be dropped within 5mm of the desired target. Servo: SunFounder SG90 Micro Digital Servo Motor SF0180 for RC Helicopter Airplane Boat Robot Controls 9G
Operation of the tool:
A seeding spike will be used to create an indentation in the soil before this seeder tool will drop the seed into the soil. The watering tool will shower a bit of water on the soil and then it will create the perfect conditions for germination.
Servo control will control the turnstyle to allow only one seed to drop at a time.
The design is similar to other seed drill designs like this one from Europe:
Over the next several months the Liberty University design team will work with this prototype and develop it into a working seeder tool.
If the seeder tool is successful FarmBot Inc. may consider including it in the tool offering. The design along with more information about the seeder tool will be released in the coming months.
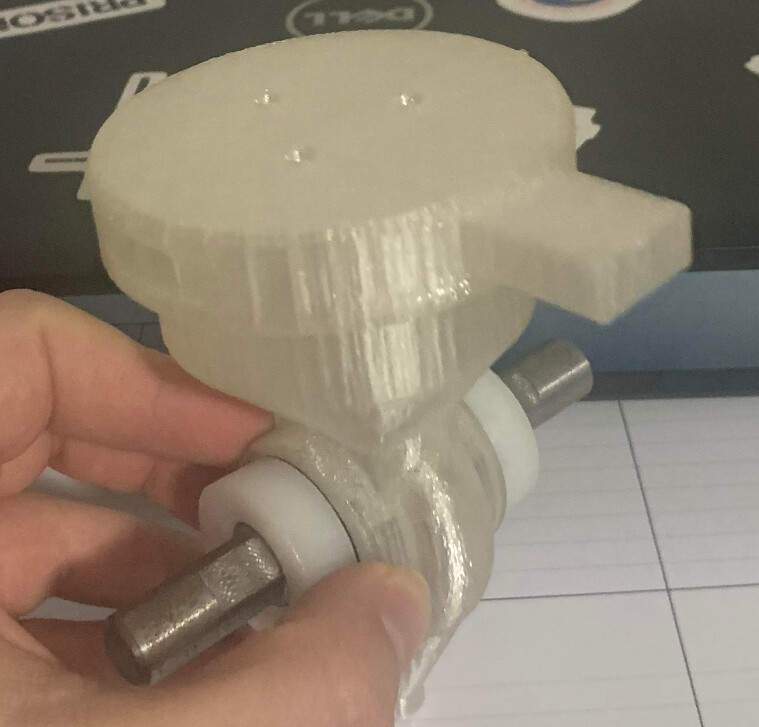
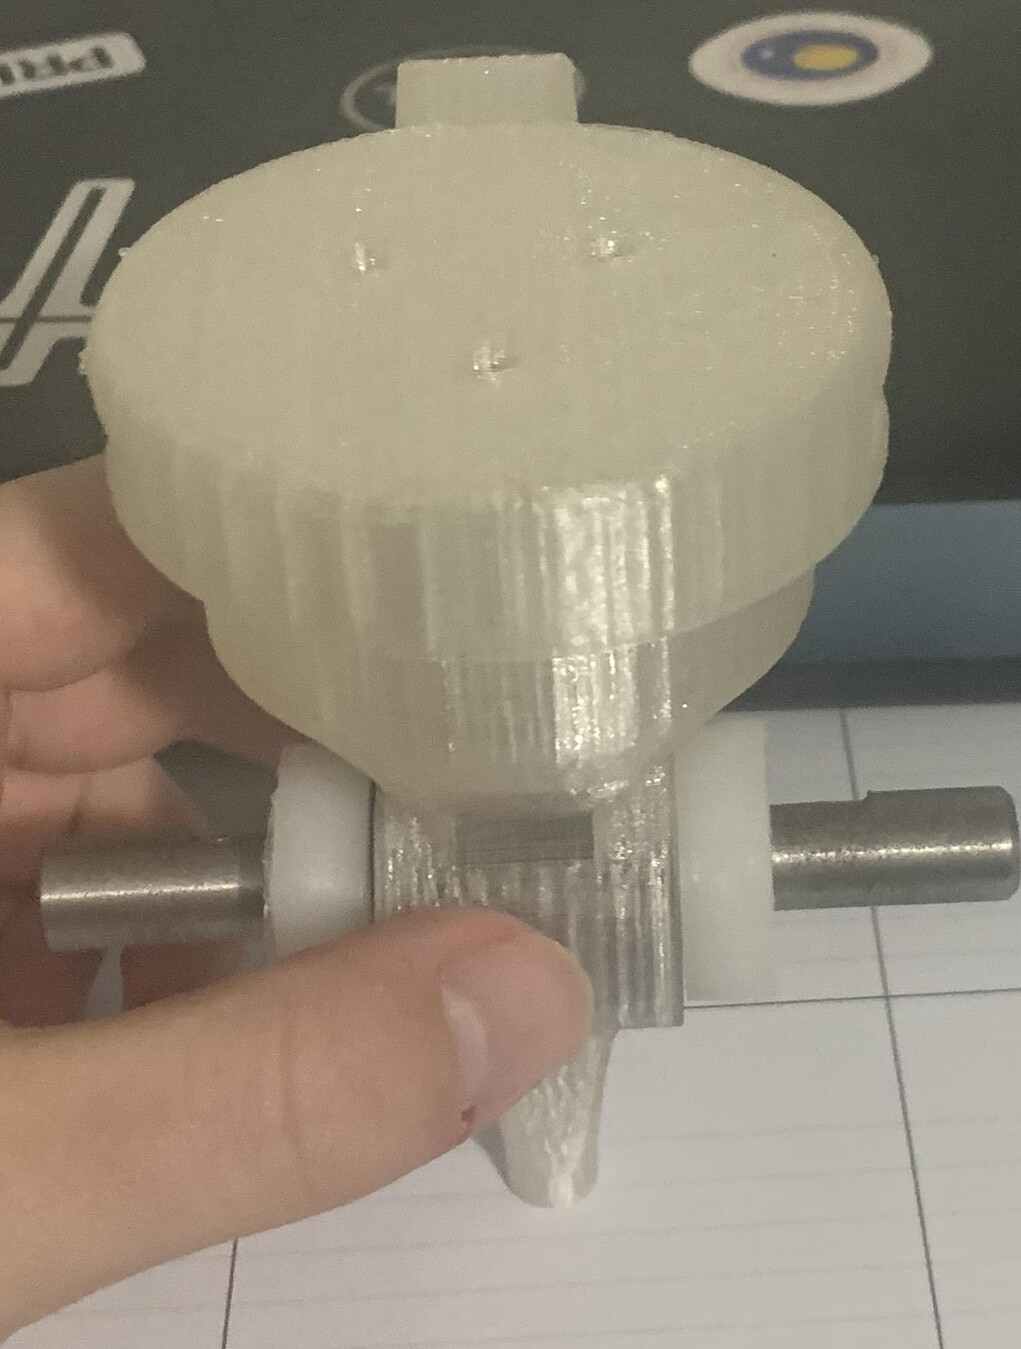
@Sjamesparsons The top will twist off similar to a pill bottle. You will add the seeds in the hopper and then put the top back on.
The turnstiles are changed out by loosening set screws and sliding off the turnstiles from the main axel. We expect to be able to accommodate 3 or 4 seed sizes.
Initially Marc, you mentioned pelleted seeds. I was assuming this meant that all seeds would be the same size from the seeder’s point of view. There are a few possible issues with small seeds becoming jammed in the turnstile, also the turnstile would have to have very tight tolerances in its housing.
Liberty University and FarmBot present an Open Source Collaboration Project: Seeder Pod Tool
After a number of design iterations and some great work the Liberty University FarmBot Project team has completed their work!
Here is the final video commercial of the new seeder pod tool design for use with pelleted seeds:
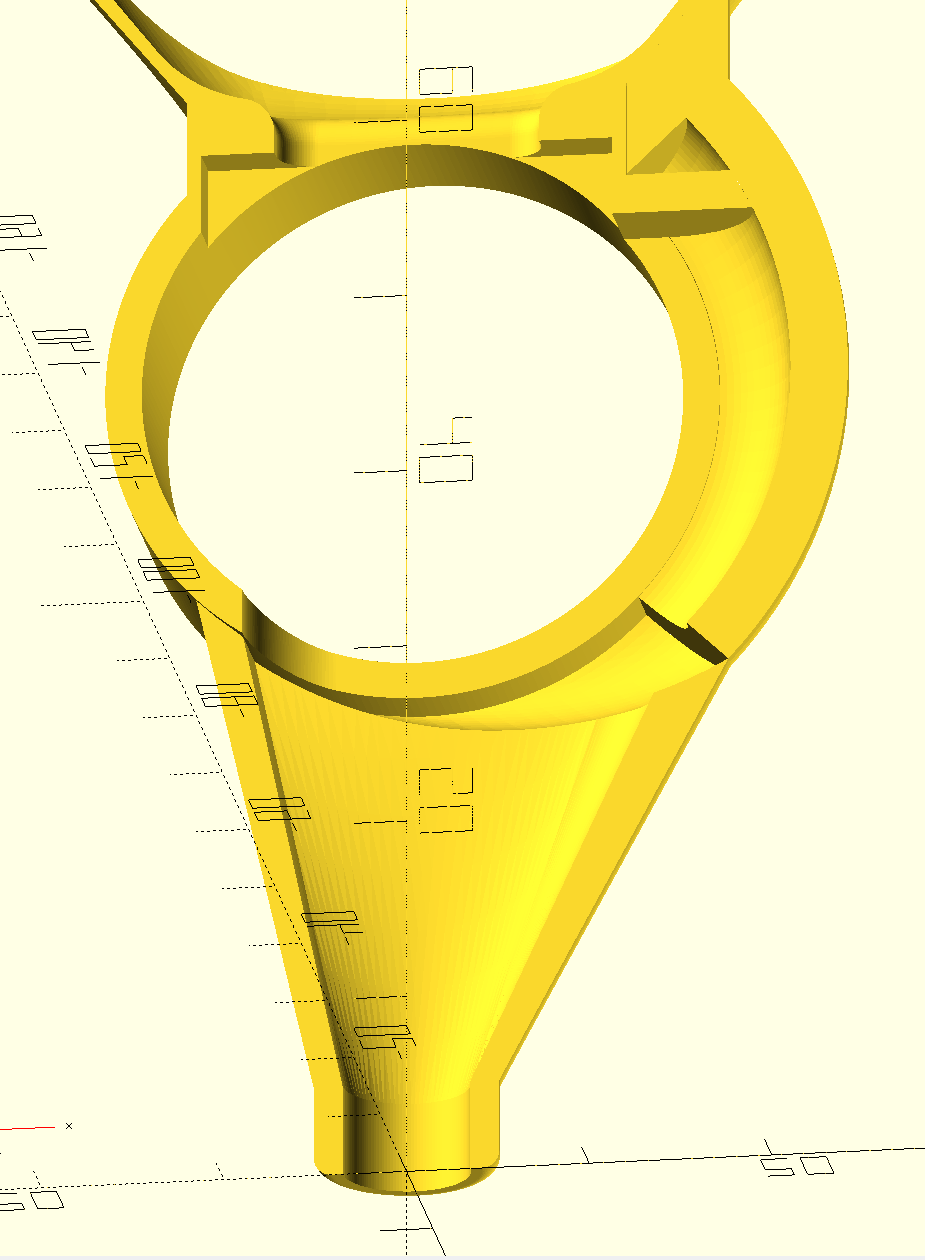
Please see the attached documentation and assembly instructions as well as the STEP files for 3D printing. This is completely open source hardware so feel free to edit, improve and modify for your own purposes.
The Seeder Pod tool uses a servo to turn the turnstyle and control the placement of the seed. To overcome the potential for seed jamming in the turnstyle mechanism we decided to use a bruit force method and overpower any risks associated with seed jamming. If a seed gets caught in the turnstyle and jams, this servo will simply crush the seed inside the turnstyle and clear the smaller broken pieces of the seed. There are many servo motors on the market, but this was the one that we selected for its strength and durability:
DS3225MG Servo Motor
High speed high torque Dimensions:1.57 x 0.78 x 1.59in (40 x 20 x 40.5mm)
Control Angle 270
Seeder_Tool_Brochure.pdf (1.5 MB)
The seeder tool brochure includes information on the basis for the design, tool assembly, programming and other information relating to the design development and decision gates of the project.
Here are the STEP files so that you can print your own.
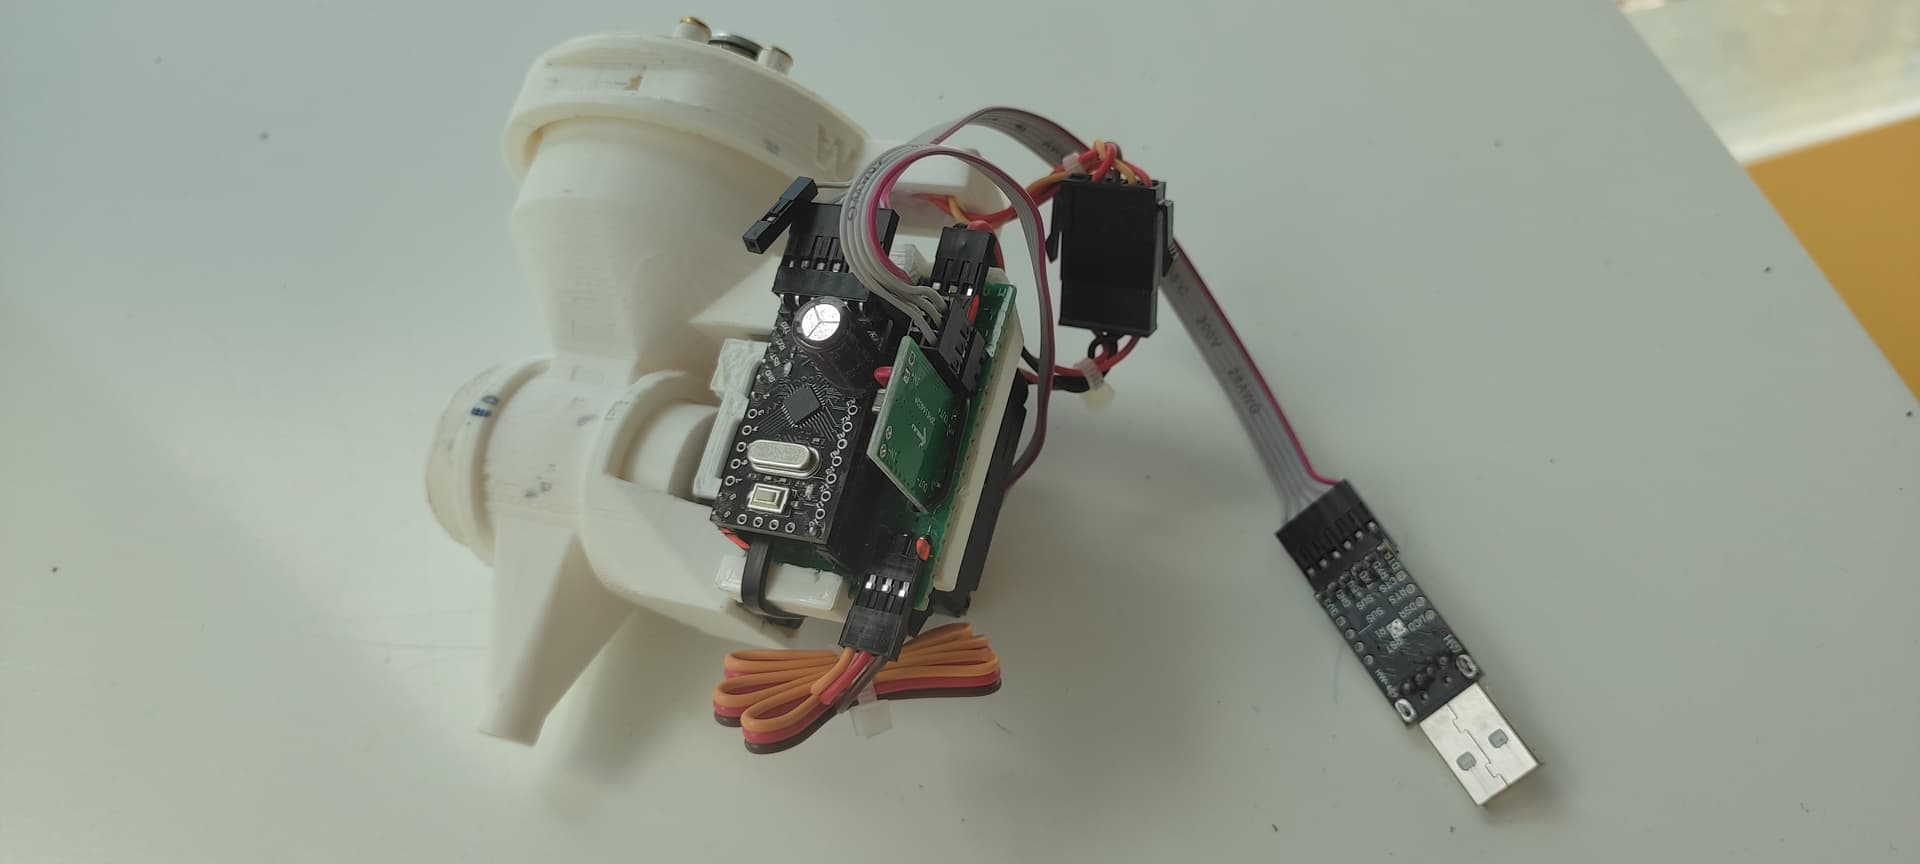
The servo motor is controlled by the Servo Motor controller directly on the Farmduino board. For this proof of concept demonstration project, the team used a direct 3 conductor wire going from the servo motor to the Farmduino board servo motor controller pins located at the bottom of the Farmduino. There is room for several servo motors to be controlled by the Farmduino micro-controller board.
However, in the future if FarmBot Inc was to release this as a tool offering in our kit, we would connect it up through the spare UTM pins and run all three conductors through the UTM.
I did try to build the seed tool described above.
This is not an prototype but just idea.
My is still not functional. The STL files have bug - when you print it there is hole in the body. I did rework the 3D model to have it configurable. Anyway the drum is sensitive to seed size which can vary (a lot in ie. reddish). Maybe there is a way prepare the seeds - sort by size and use various size of the drum but anyway the seed can stuck by grinding.
I would prefer vertical disc instead of the drum, this could be cleaned automatically by a brush.
The design is meant to work with pelleted seeds which are almost perfect spheres and they are all basically the same size. With natural seeds there is too much variation in seed size and you may encounter seeds that get stuck and jam up the mechanism.
The design from liberty university was loosely based on this precision garden seed drill tool.
Hi Marc, the variation in shape and size of i.e. reddish is really wide. Based on my testing they stuck in this type of inserts extremely easily. Would be good to have some cleaning mechanism as small spring or sponge on bottom of the turnstile hole. Maybe have optical check to have could improve reliability of this tool.
I also do not see way the farmbot could control this tool - like detect errors and make appropriate response. I did check rs485 with MCU on this tool but this requires more testing. The communication on UTM cable works and farmbot scripts can handle it when it is connected to rpi’s free uart.
Unfortunately this tool is quite time consuming idea. Let’s see next spring if more effort could help with this idea.